TABLE OF CONTENTS
-trzeba chyba robic na koncu, nie aktualizuje sie
- No headings available. Use Paragraph Format to add one.

Introduction - vocabulary
Before setting up Title and Abstract (TiAb) screening instructions, review these key Laser AI terms and definitions to familiarize yourself with the platform components.
AI Ranking: An automated prioritization model that dynamically sorts records by probability of inclusion, bringing high-relevance studies to the top of the queue. Sorting runs automatically in the background, so no AI-specific suggestion badges or actions appear in the Focus mode panel. In the Reference List panel, click Apply ranking to re-rank references after screening a specified batch of records. Note that this manual re-ranking feature is only available in the Reference List view and does not apply to Focus Mode screening.
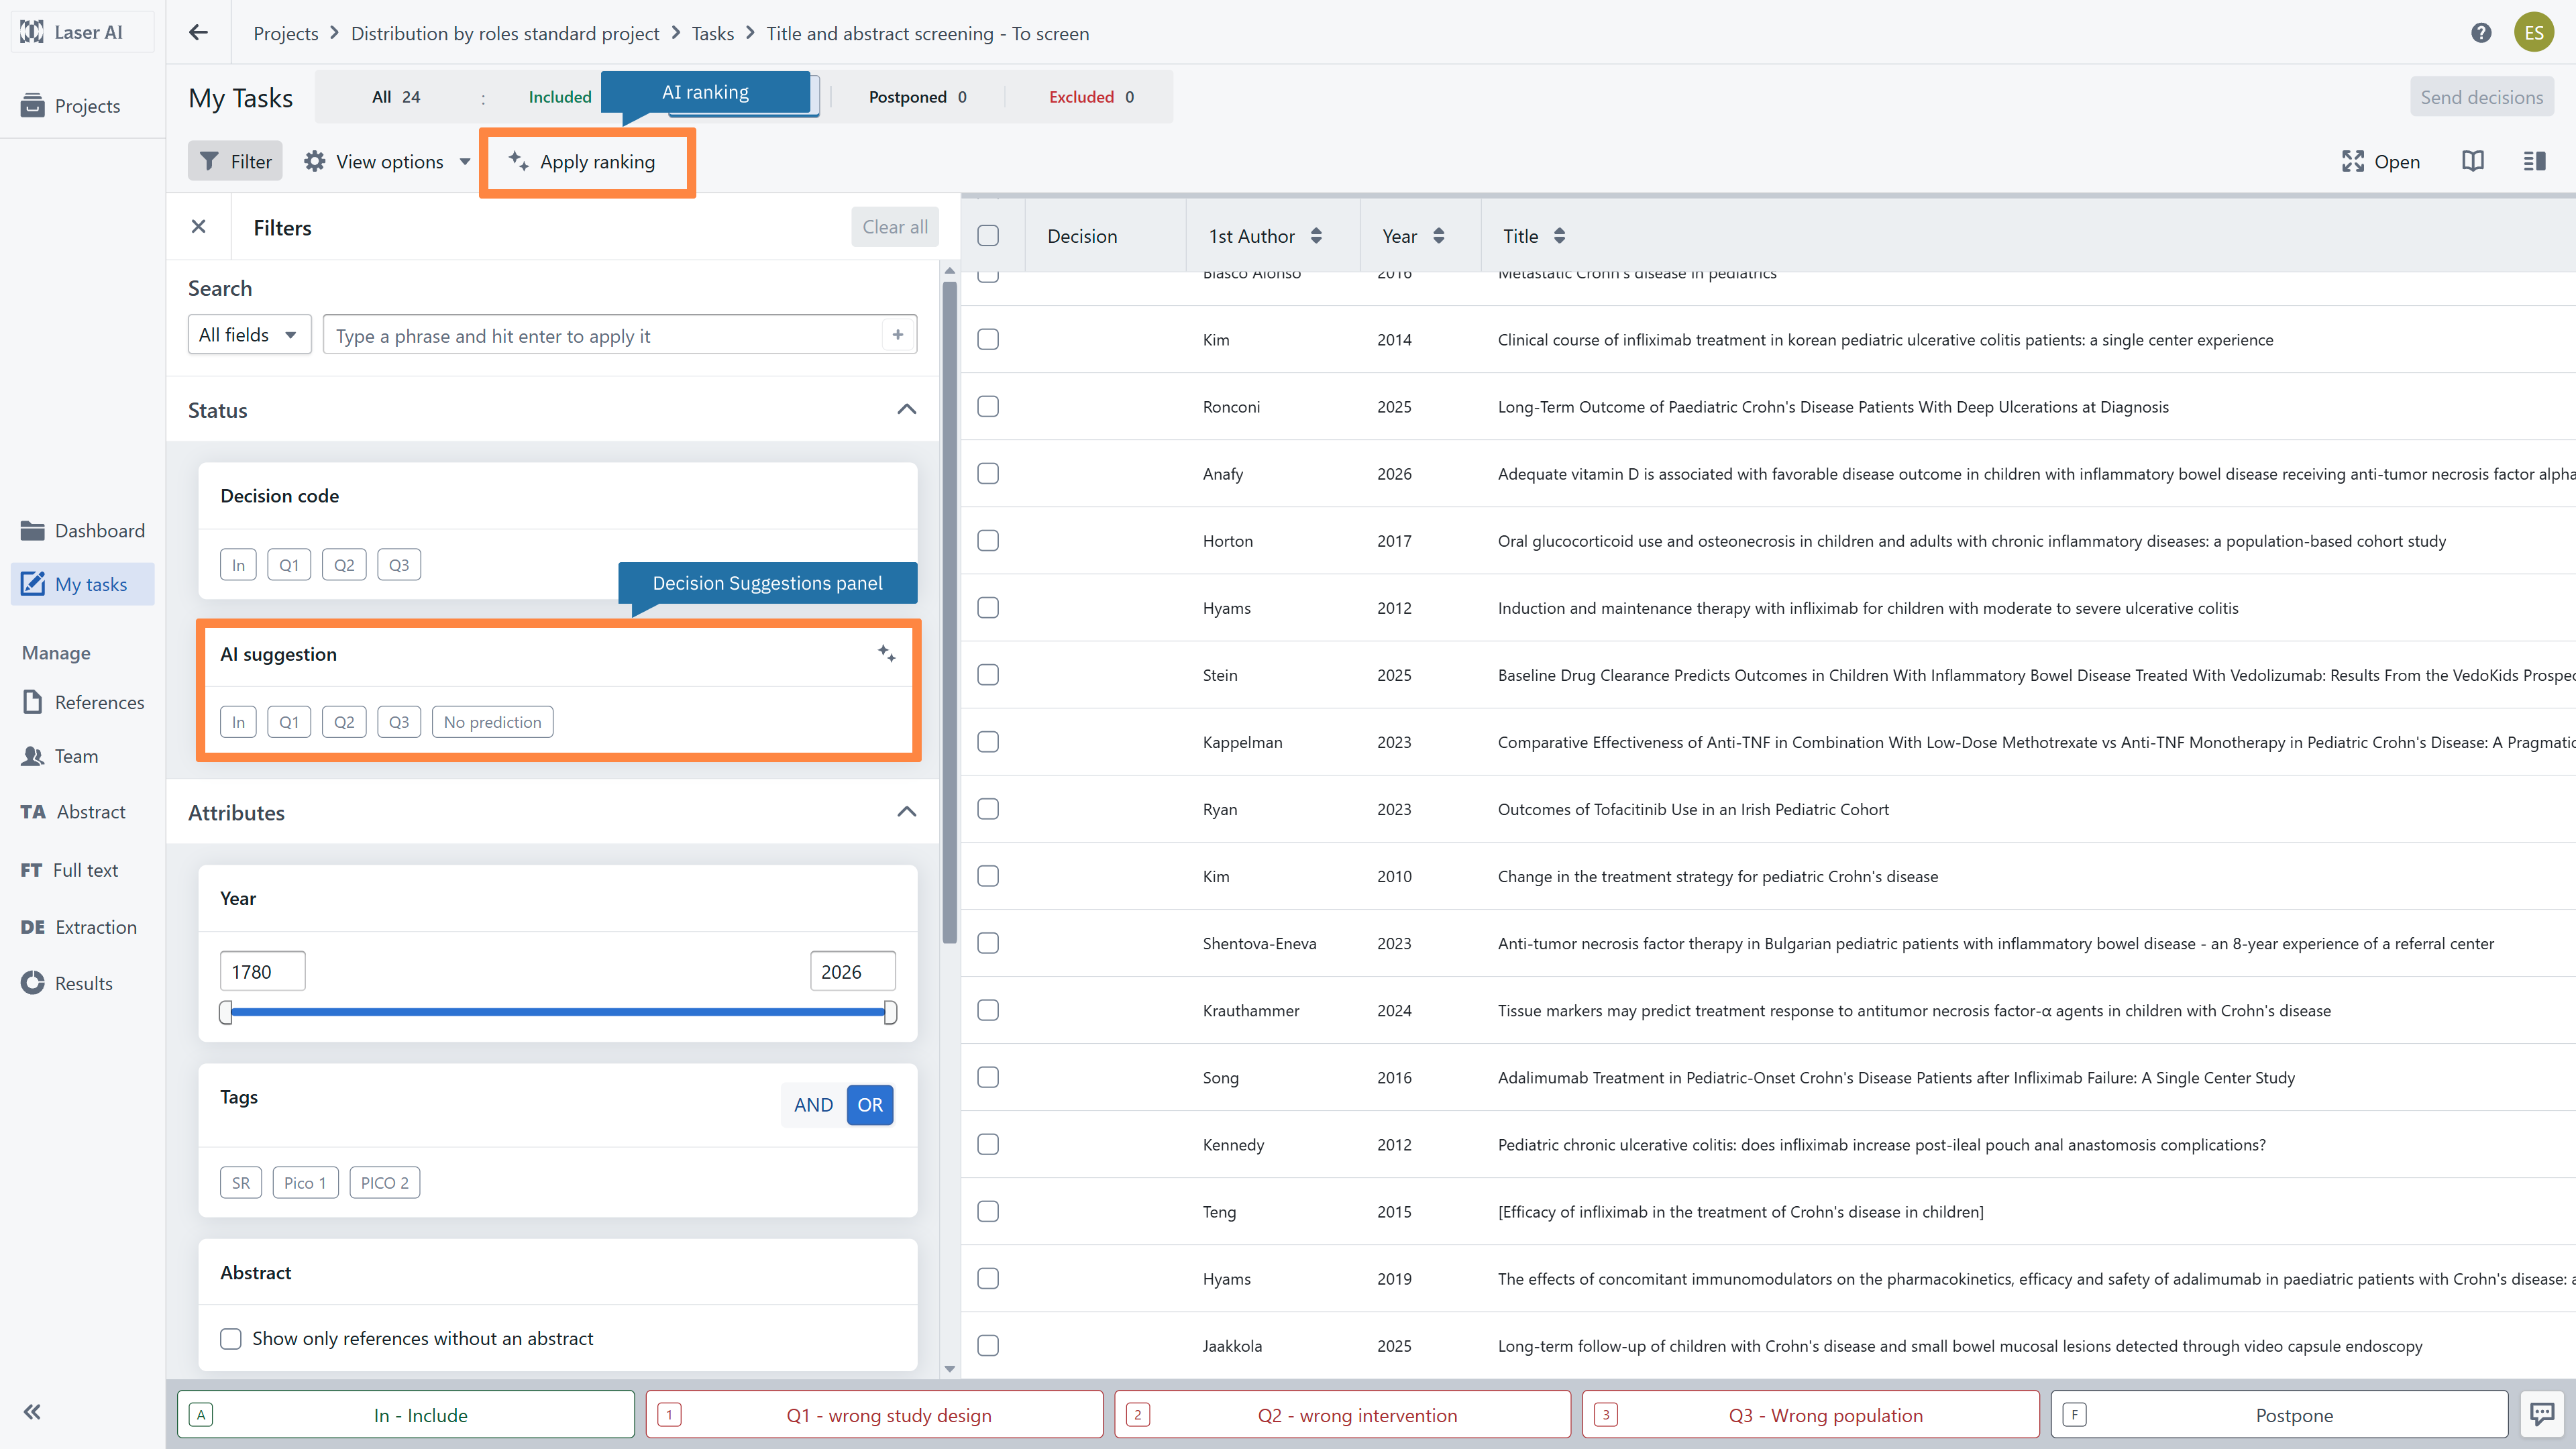
Decision Suggestions: AI-generated screening recommendations (IN or OUT) derived from evaluating record text against configured criteria and decision rules. Decision suggestions are available both in the Reference list and Focus mode panels.
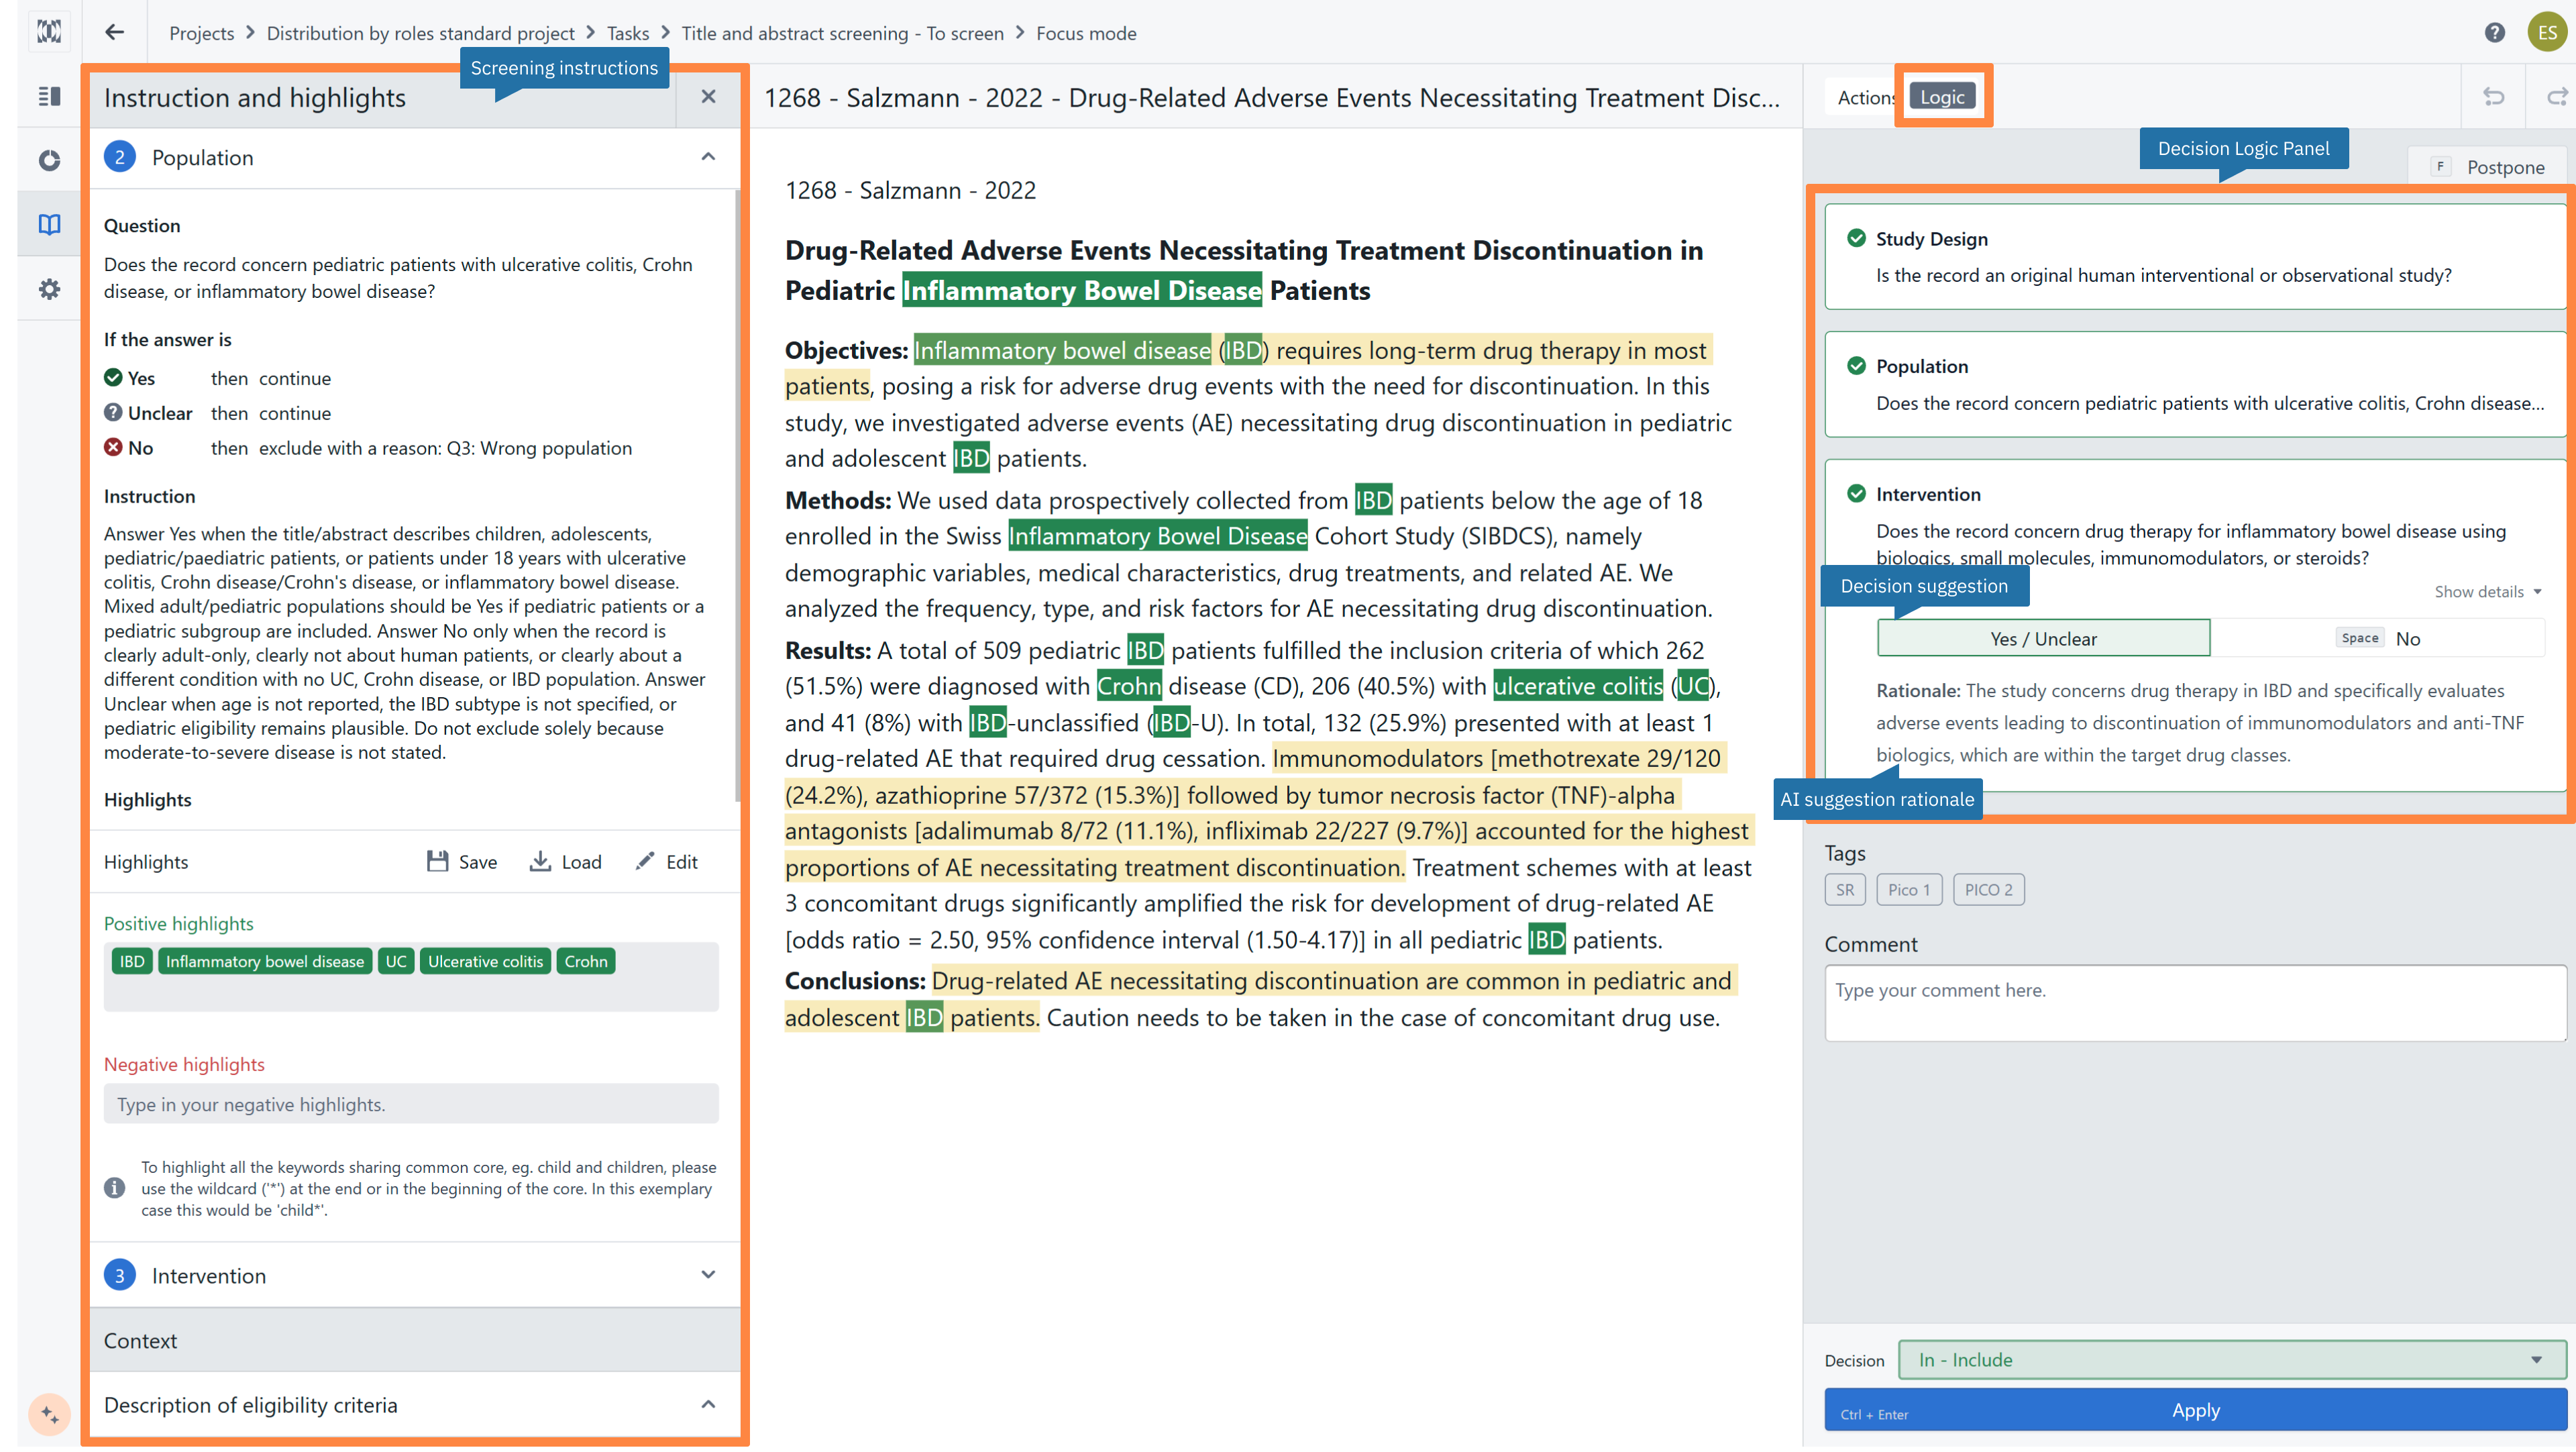
Actions Panel: Allows reviewers to mark studies as Include or Exclude during screening in Focus mode. If enabled during project setup, AI-generated decision suggestions appear alongside these buttons to assist your choices
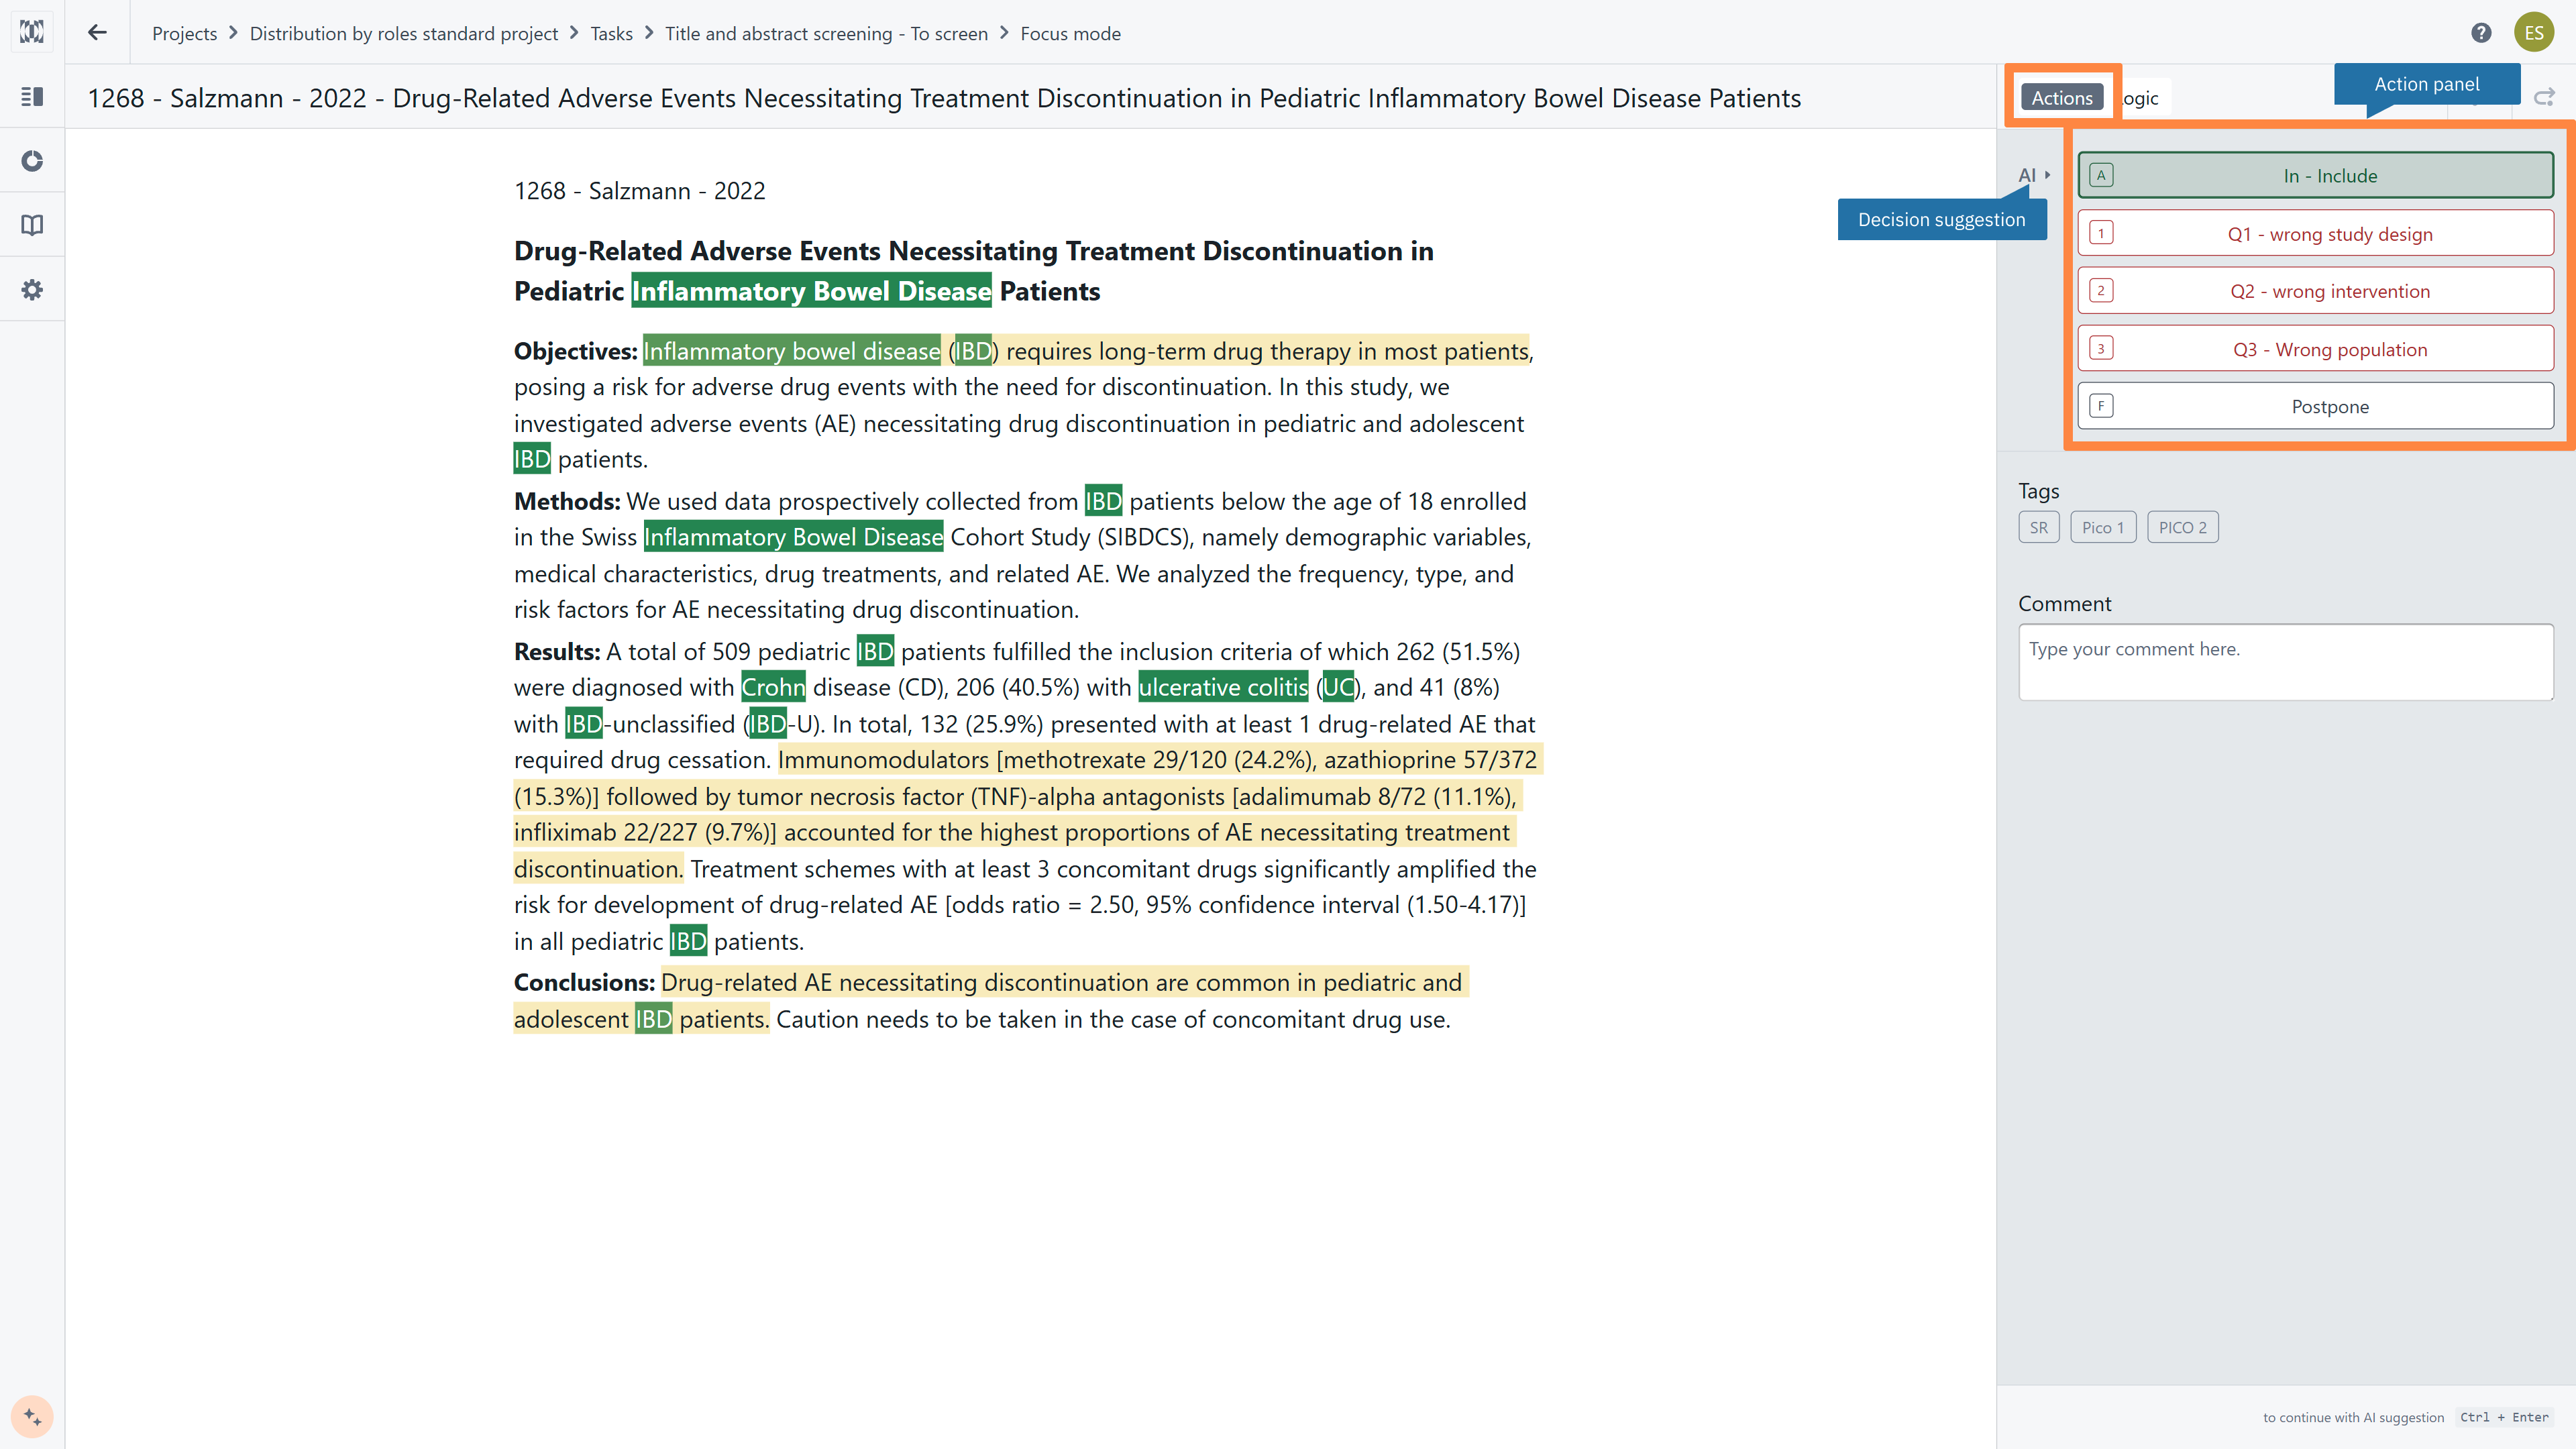
Decision Logic Panel: The interactive sidebar displaying structured screening questions, instructions, and AI decision with rationale for each question (if enabled during setup)
Screening Instructions: An on-demand panel that provides guidance and eligibility criteria (inclusion/exclusion rules) to help researchers make consistent screening decisions
Setting up
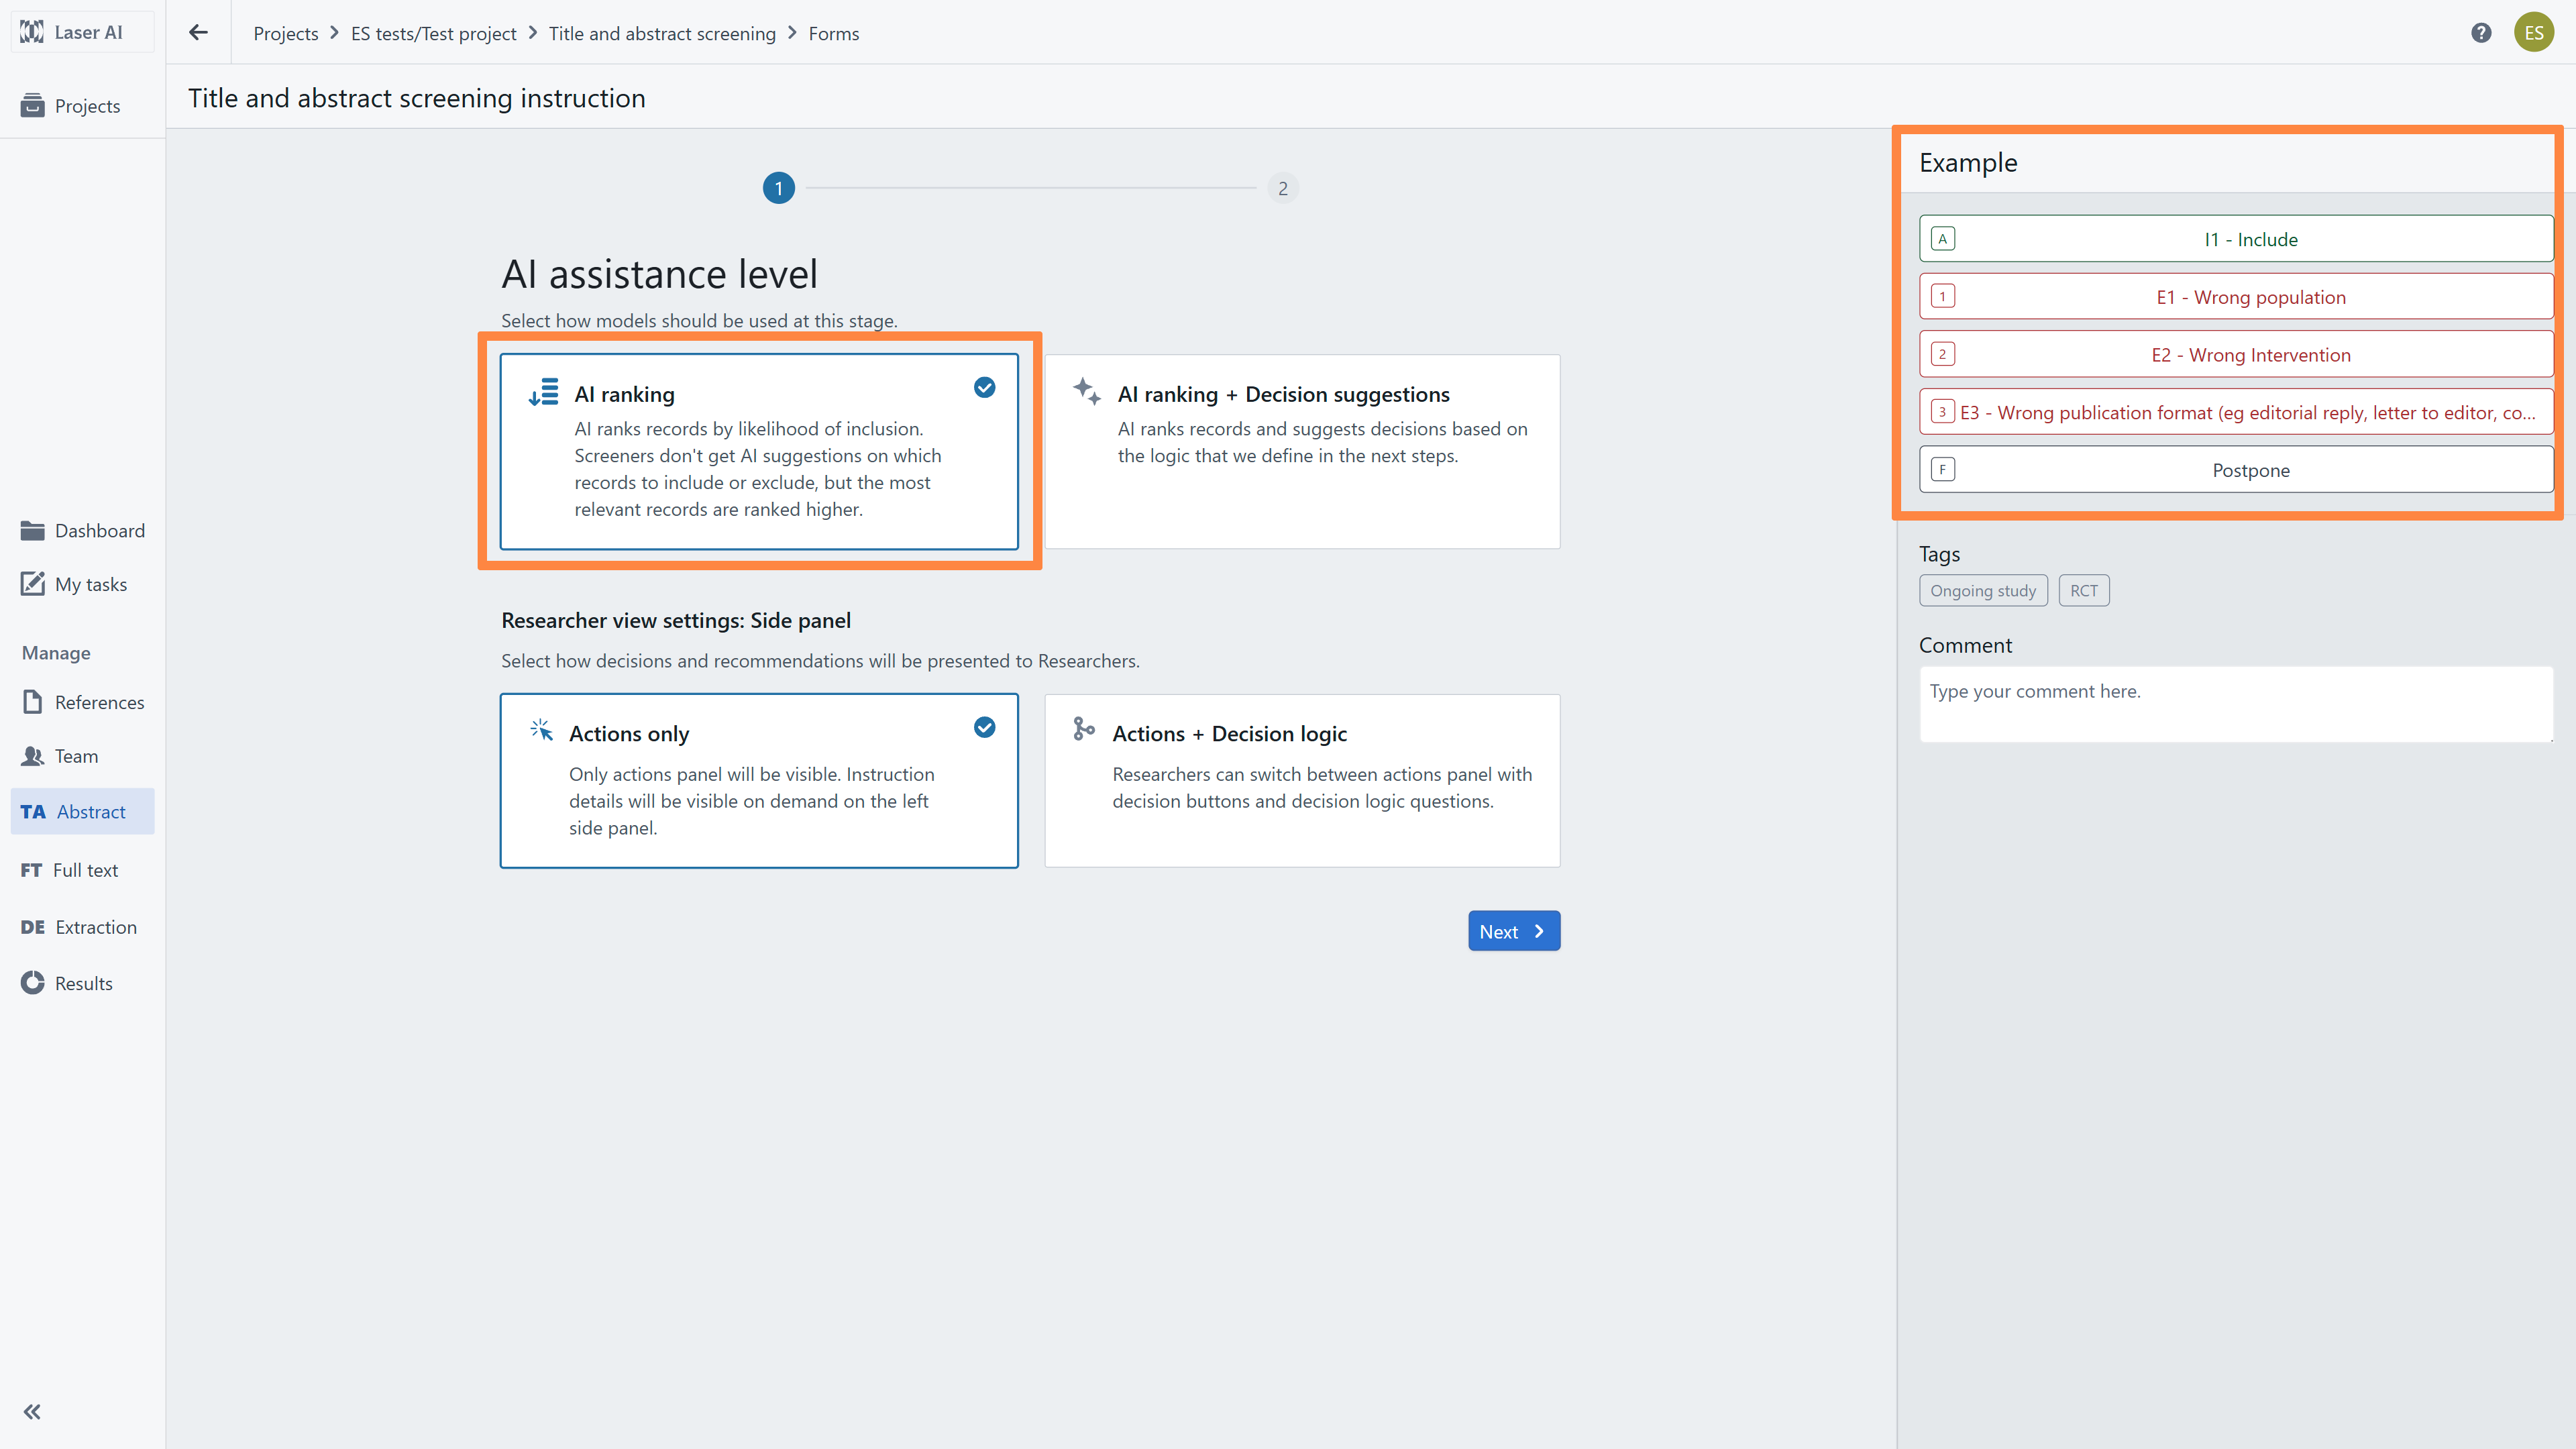
To set up the instructions, first define how AI models assist reviewers during the Title and Abstract screening stage by selecting one of two support levels:
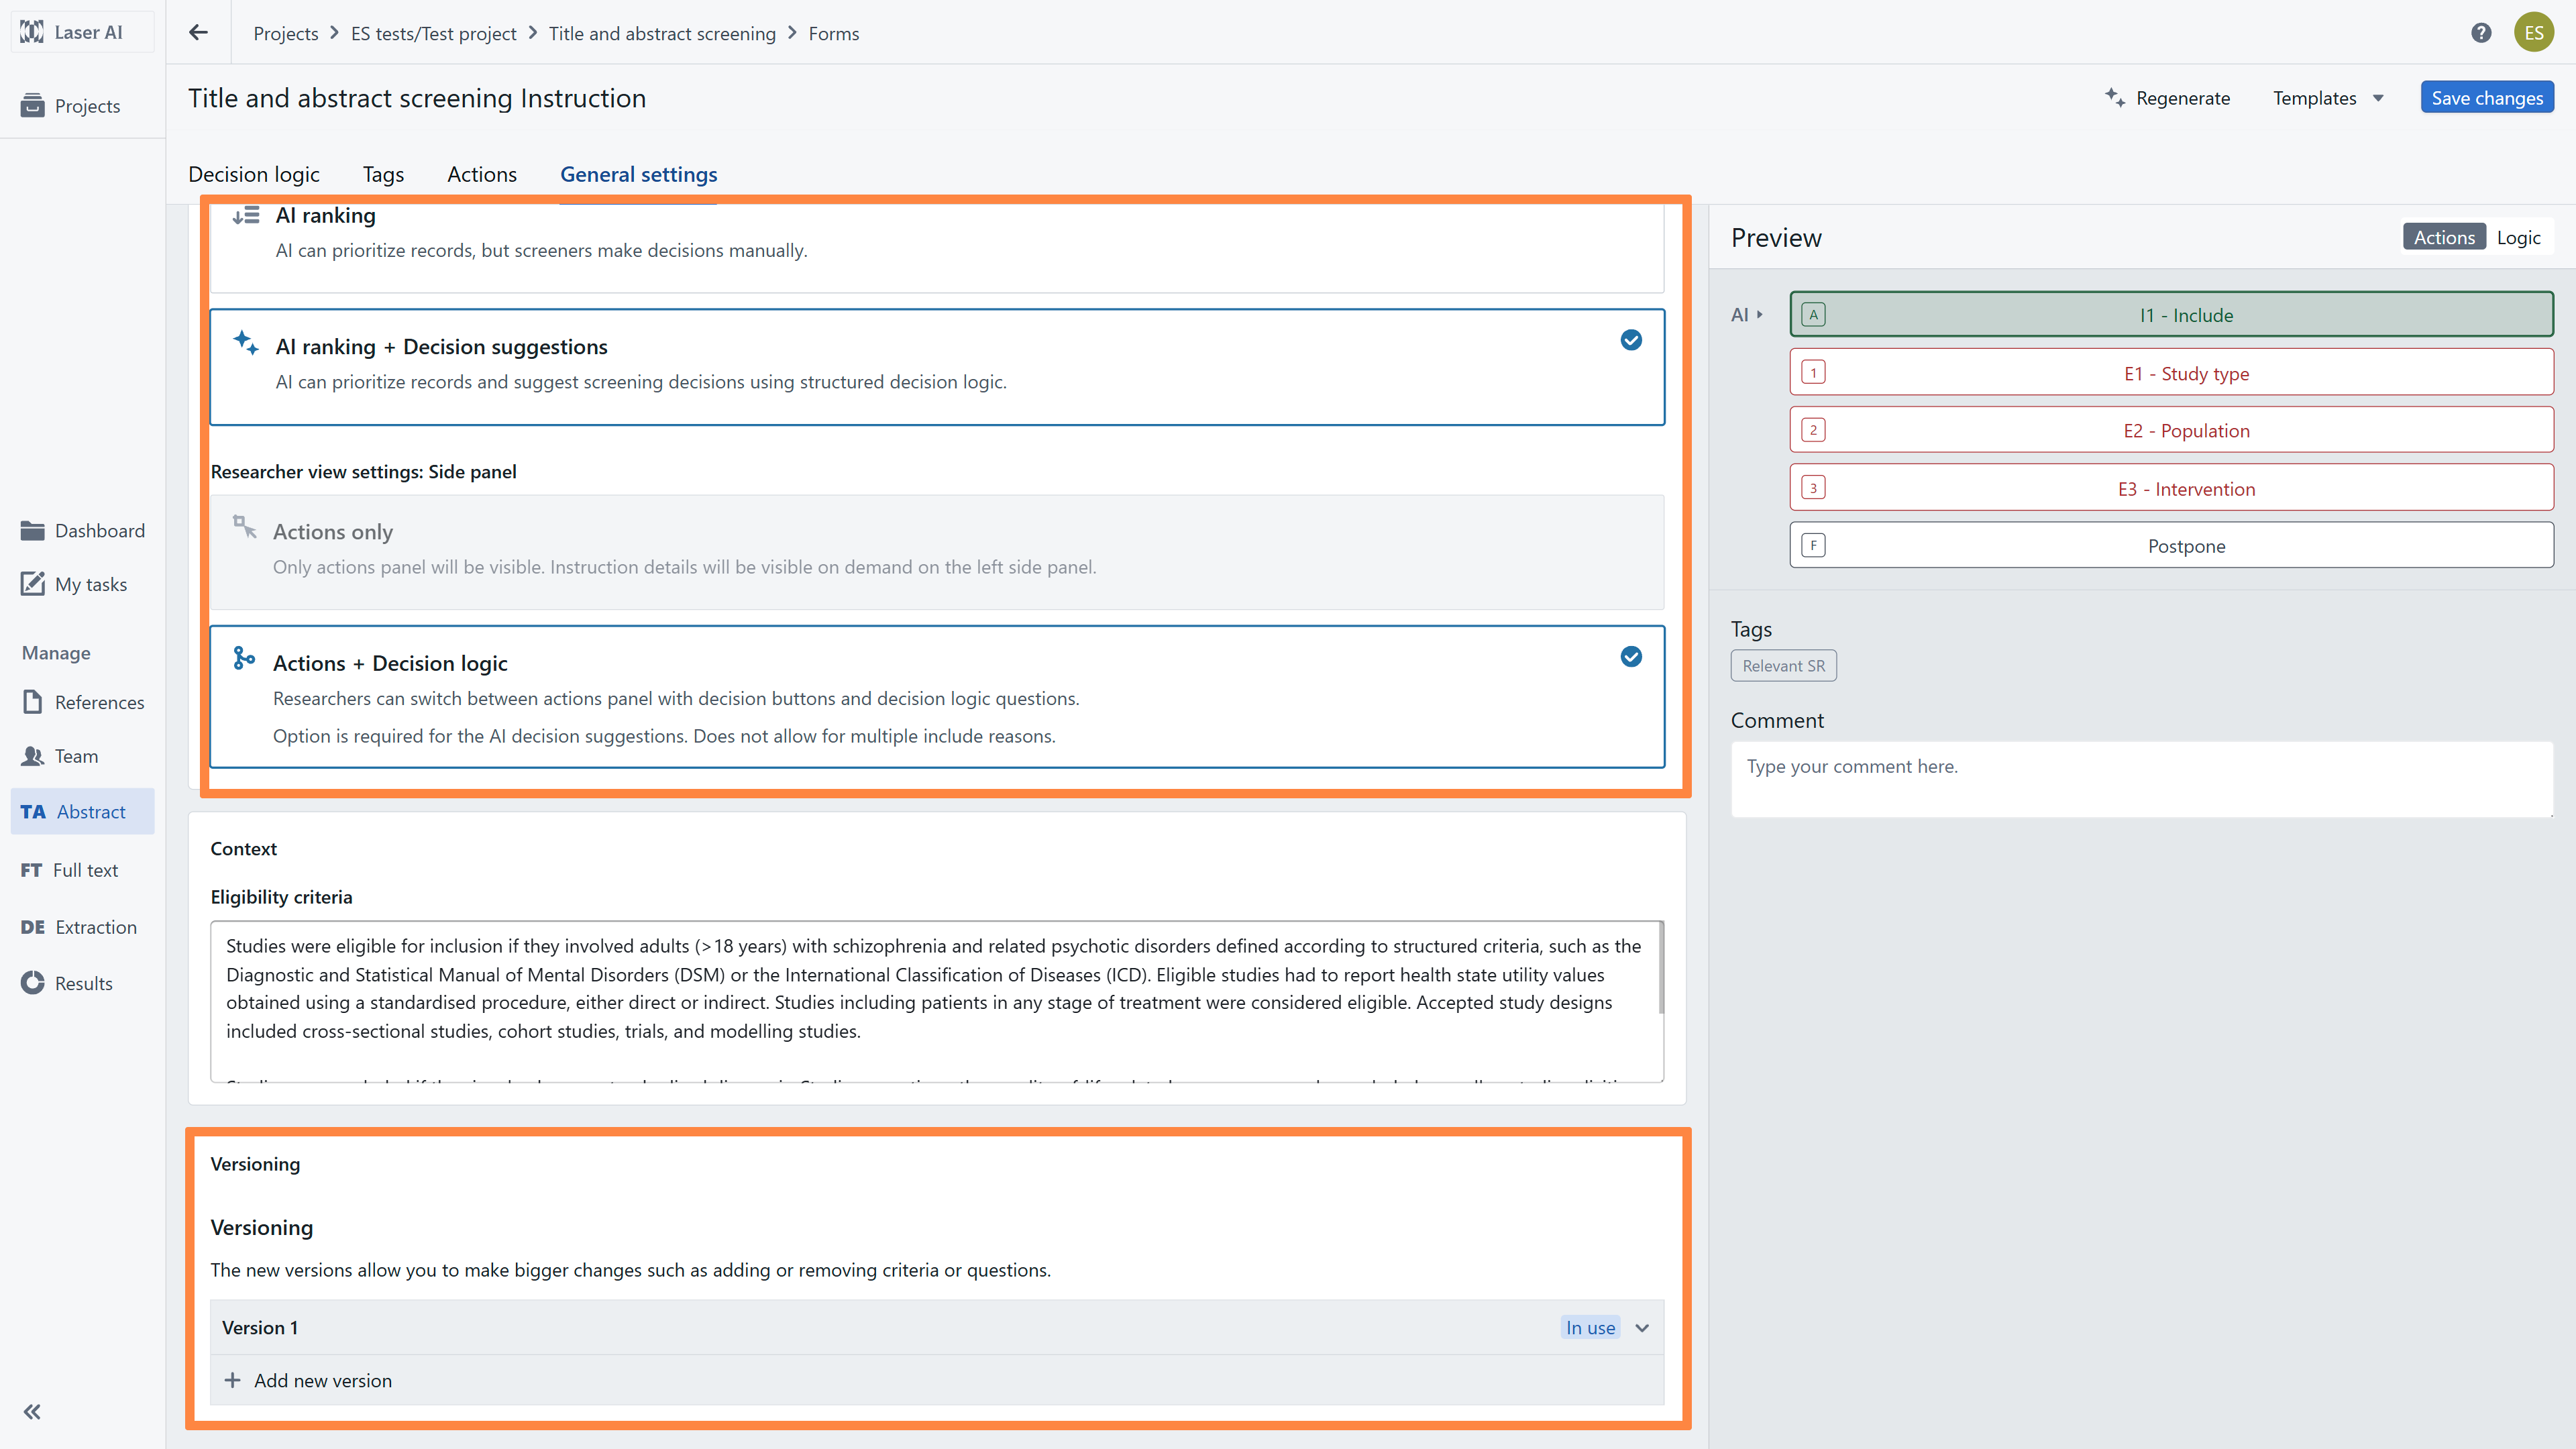
AI ranking - Sorts records by probability of inclusion. AI-generated decision suggestions are disabled, making record prioritization the sole active feature.
AI ranking + decision suggestions - Combines record prioritization with automated decision recommendations. The model suggests an IN or OUT decision for each record based on your specified criteria and logic.
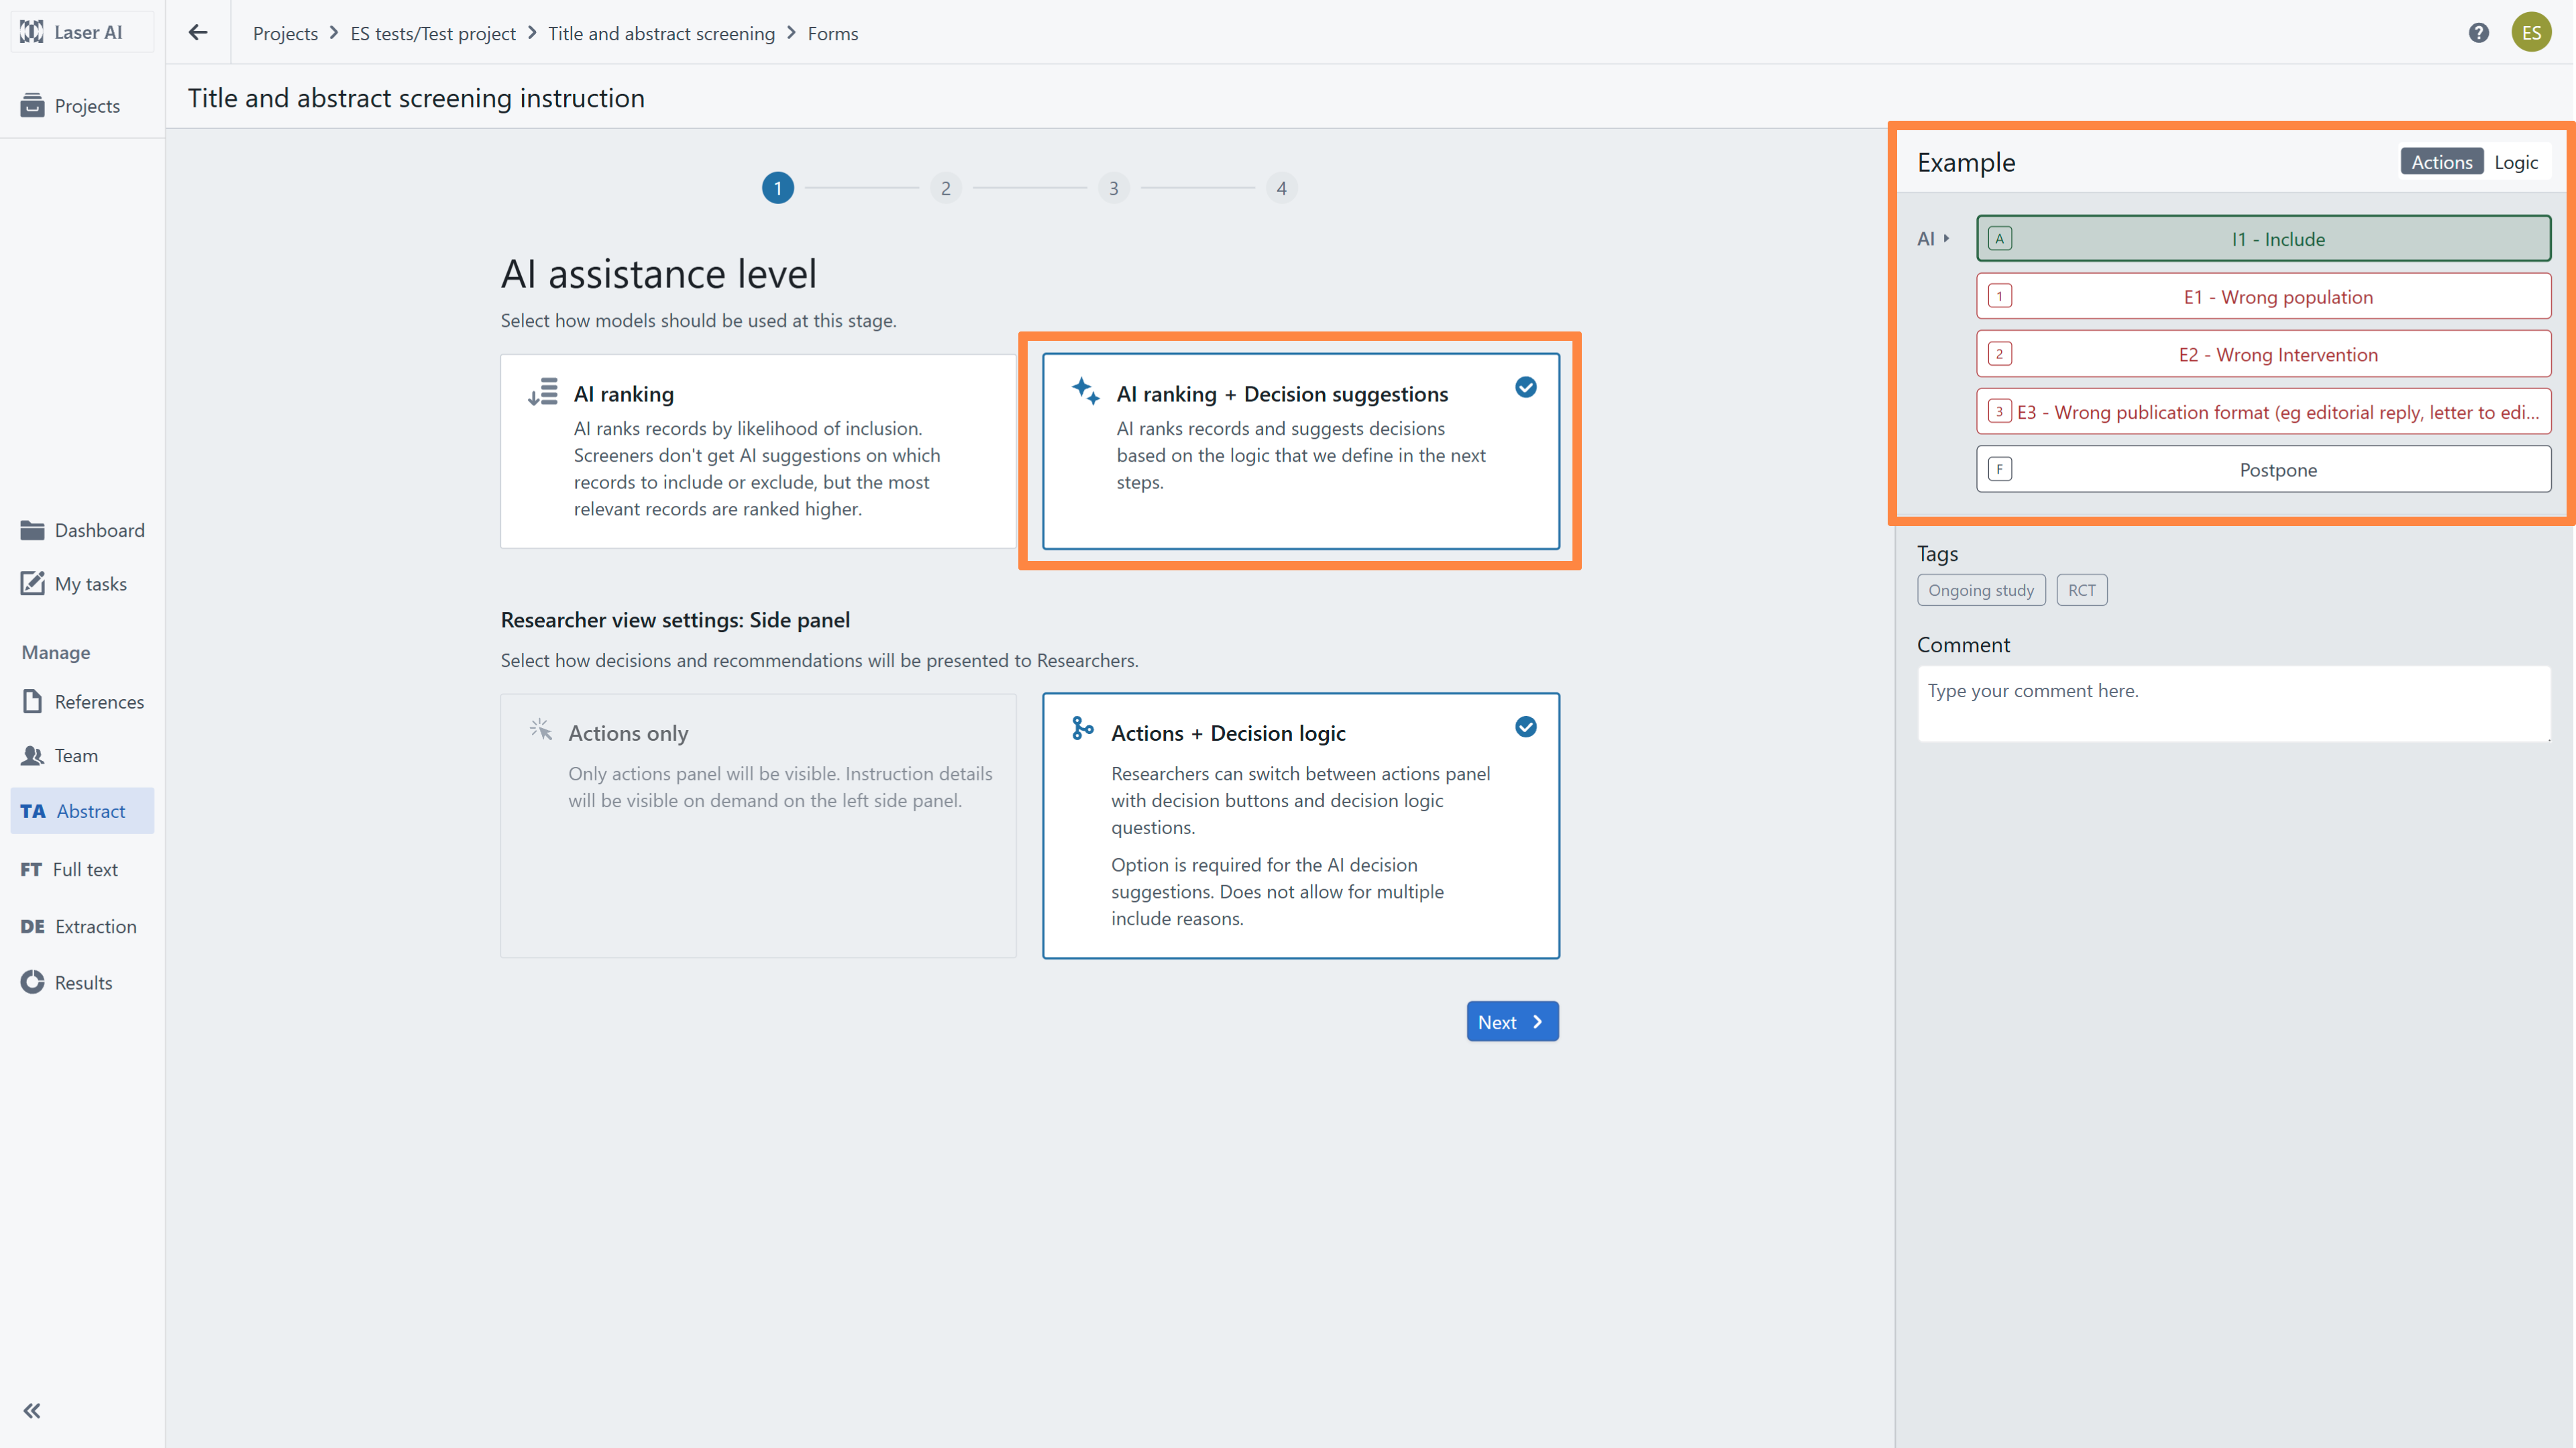
Next, choose how decisions, criteria, and recommendations appear to reviewers during screening based on your selected AI support level:
If "AI ranking" was selected:
Actions only - Displays only the Inclusion/Exclusion action buttons on the right panel. Instruction details can be expanded on the left panel, while the right Decision Logic panel is disabled.
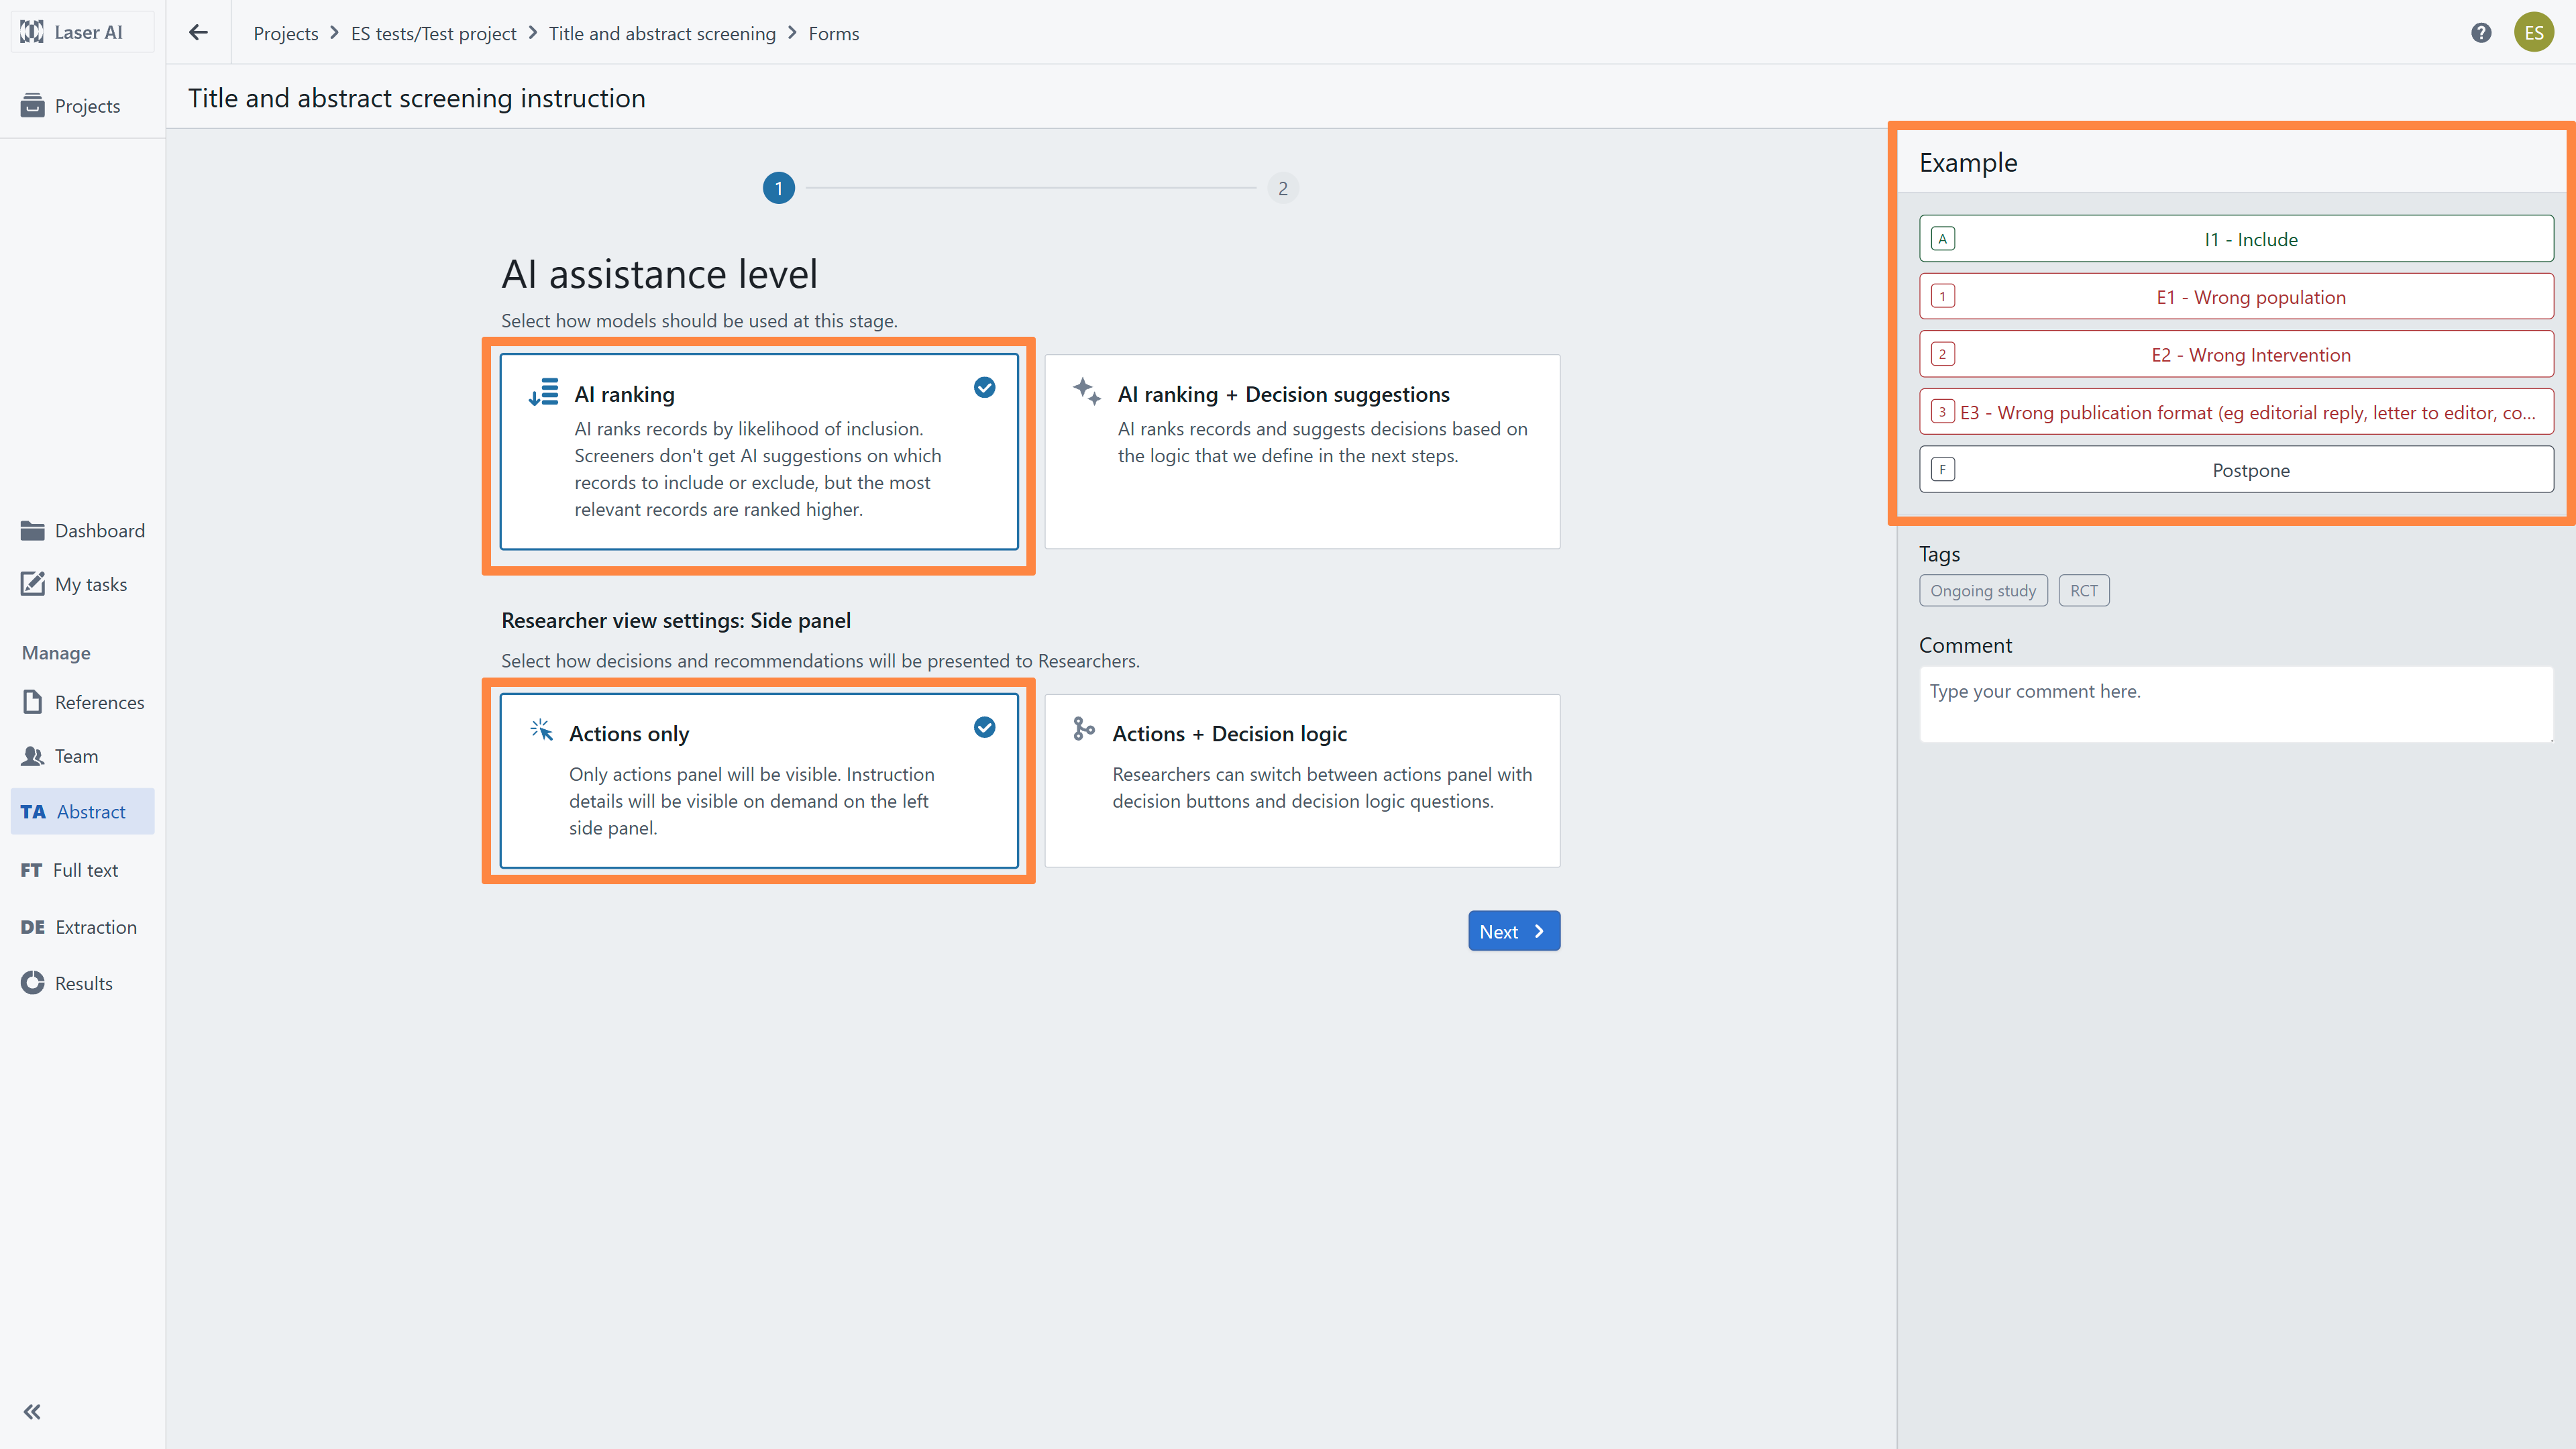
Actions+decision logic - allows Reviewers to switch between the Inclusion/Exclusion decision buttons and detailed eligibility questions.
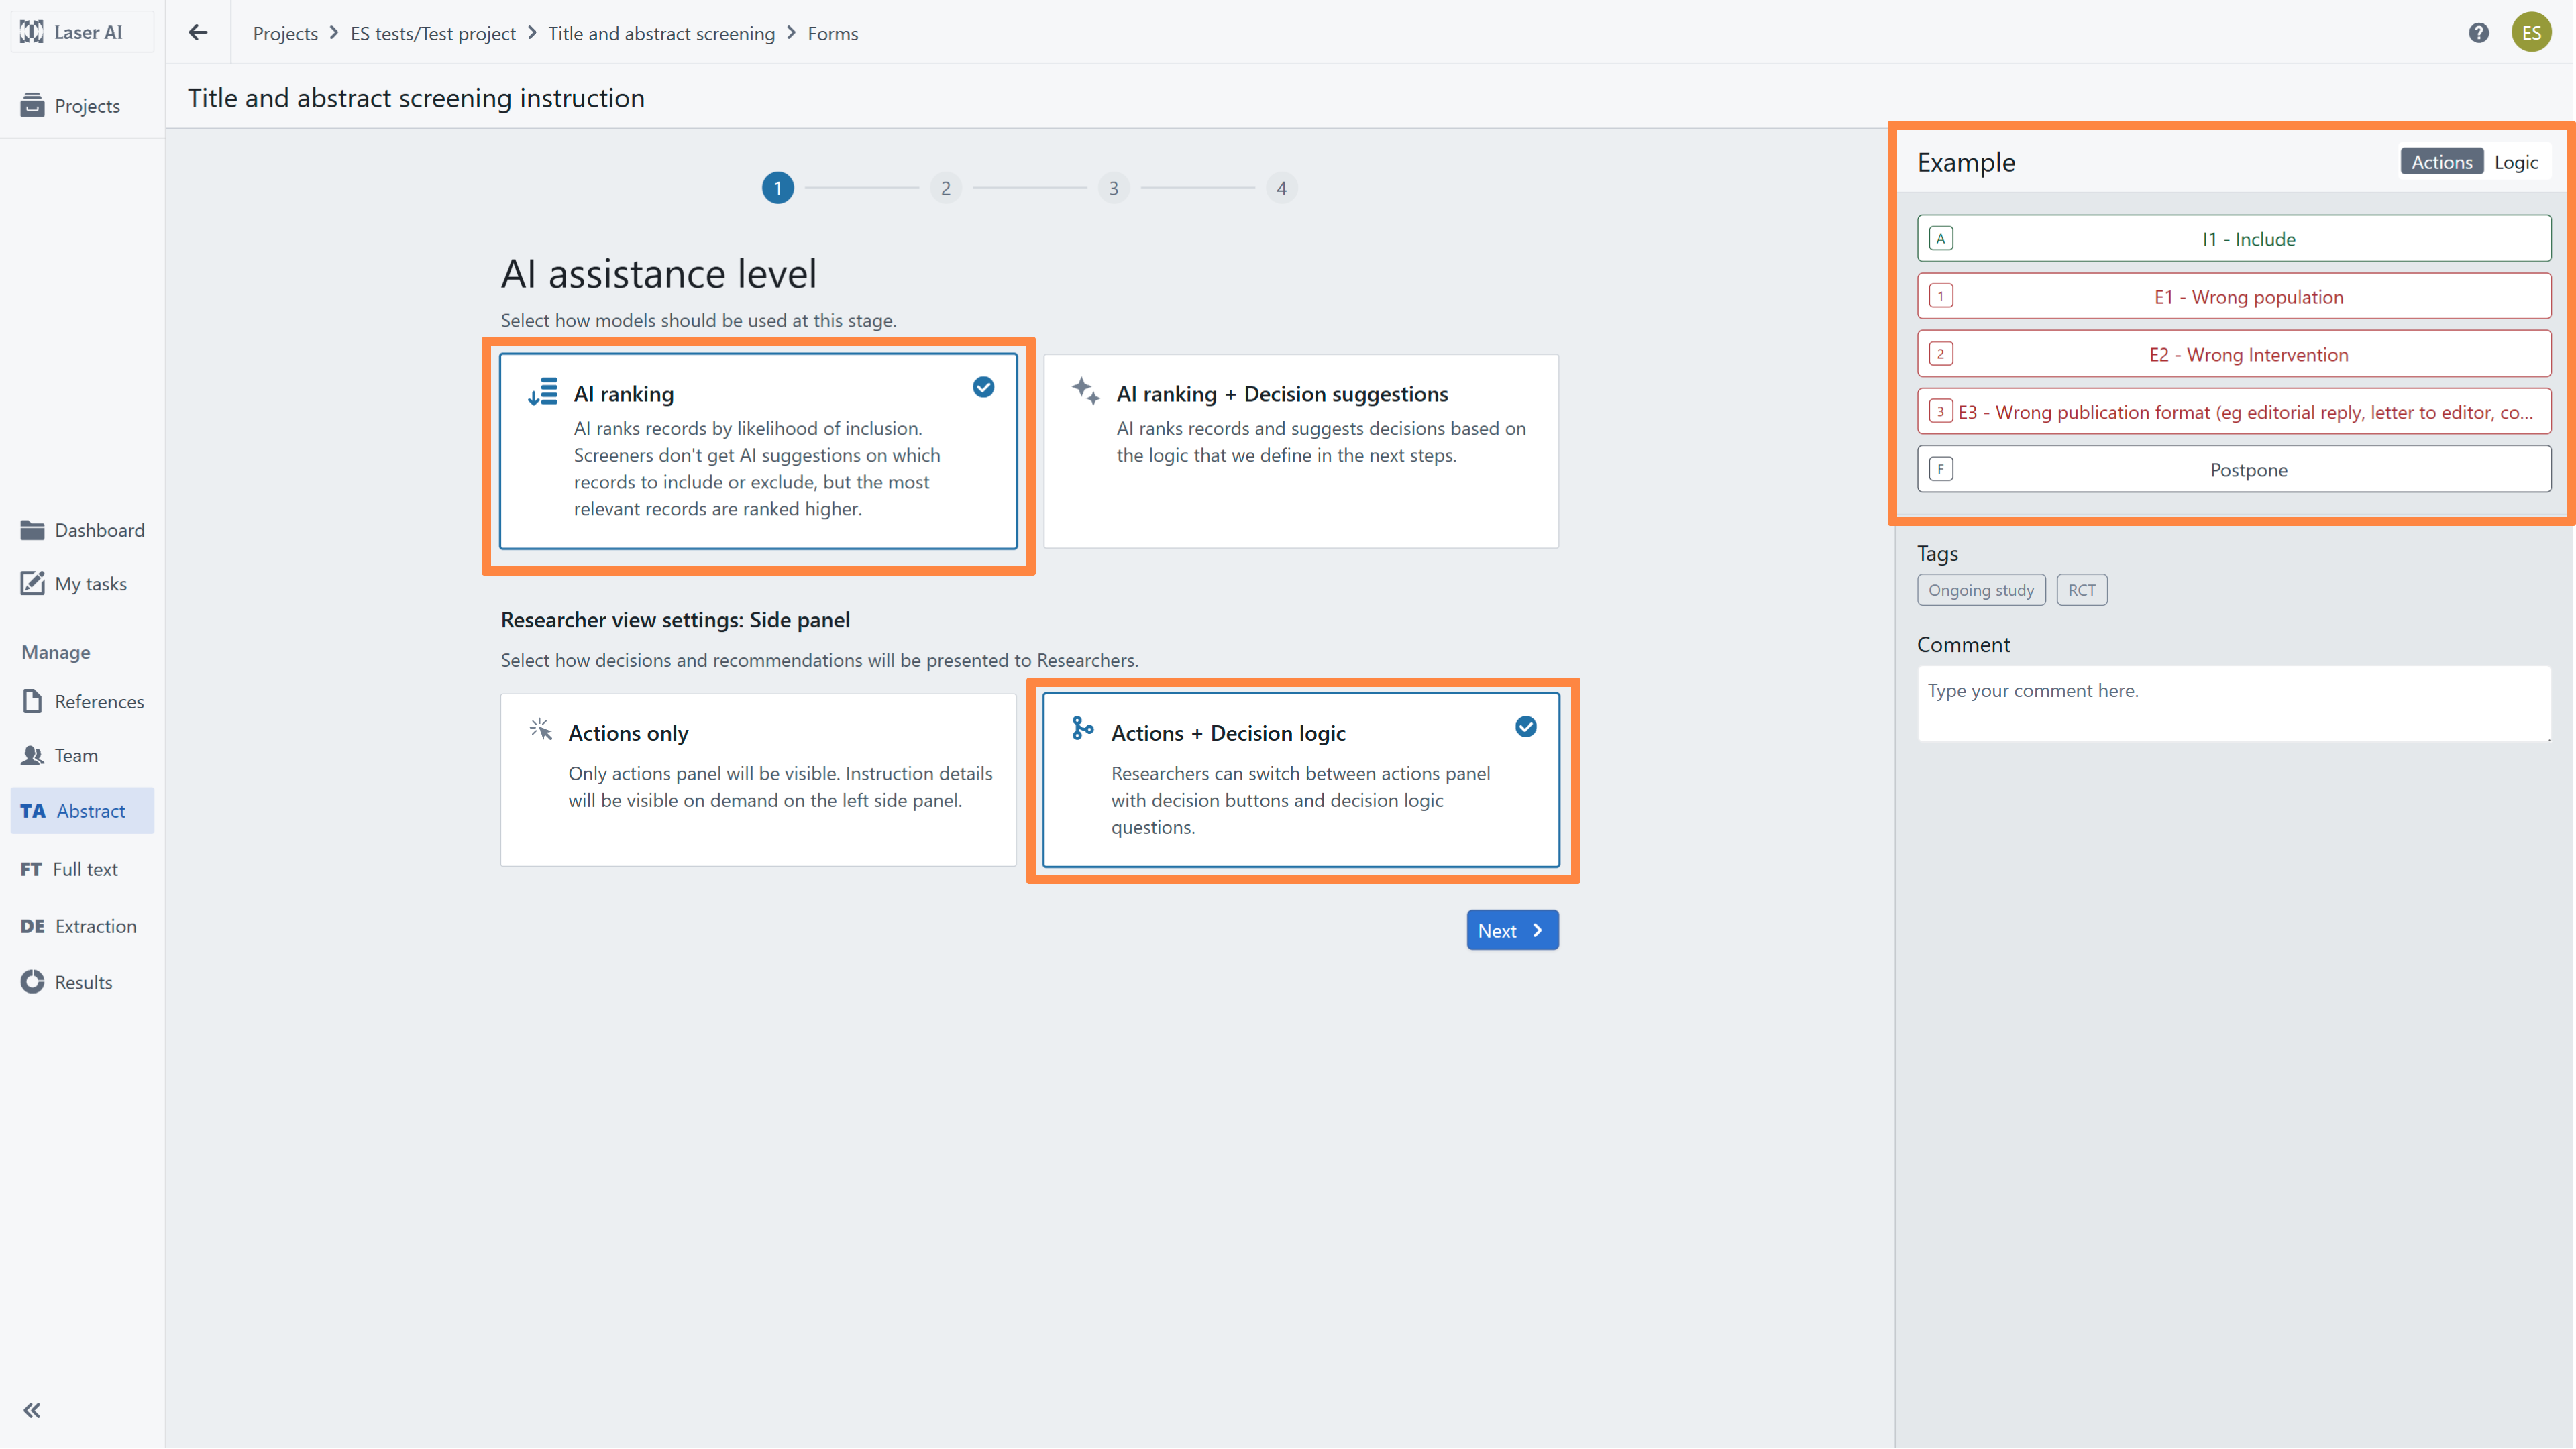
If "AI ranking + Decision suggestions" was selected:
Actions + decision logic (Default): Automatically applies the interactive layout, allowing reviewers to switch between Inclusion/Exclusion buttons and detailed eligibility questions.
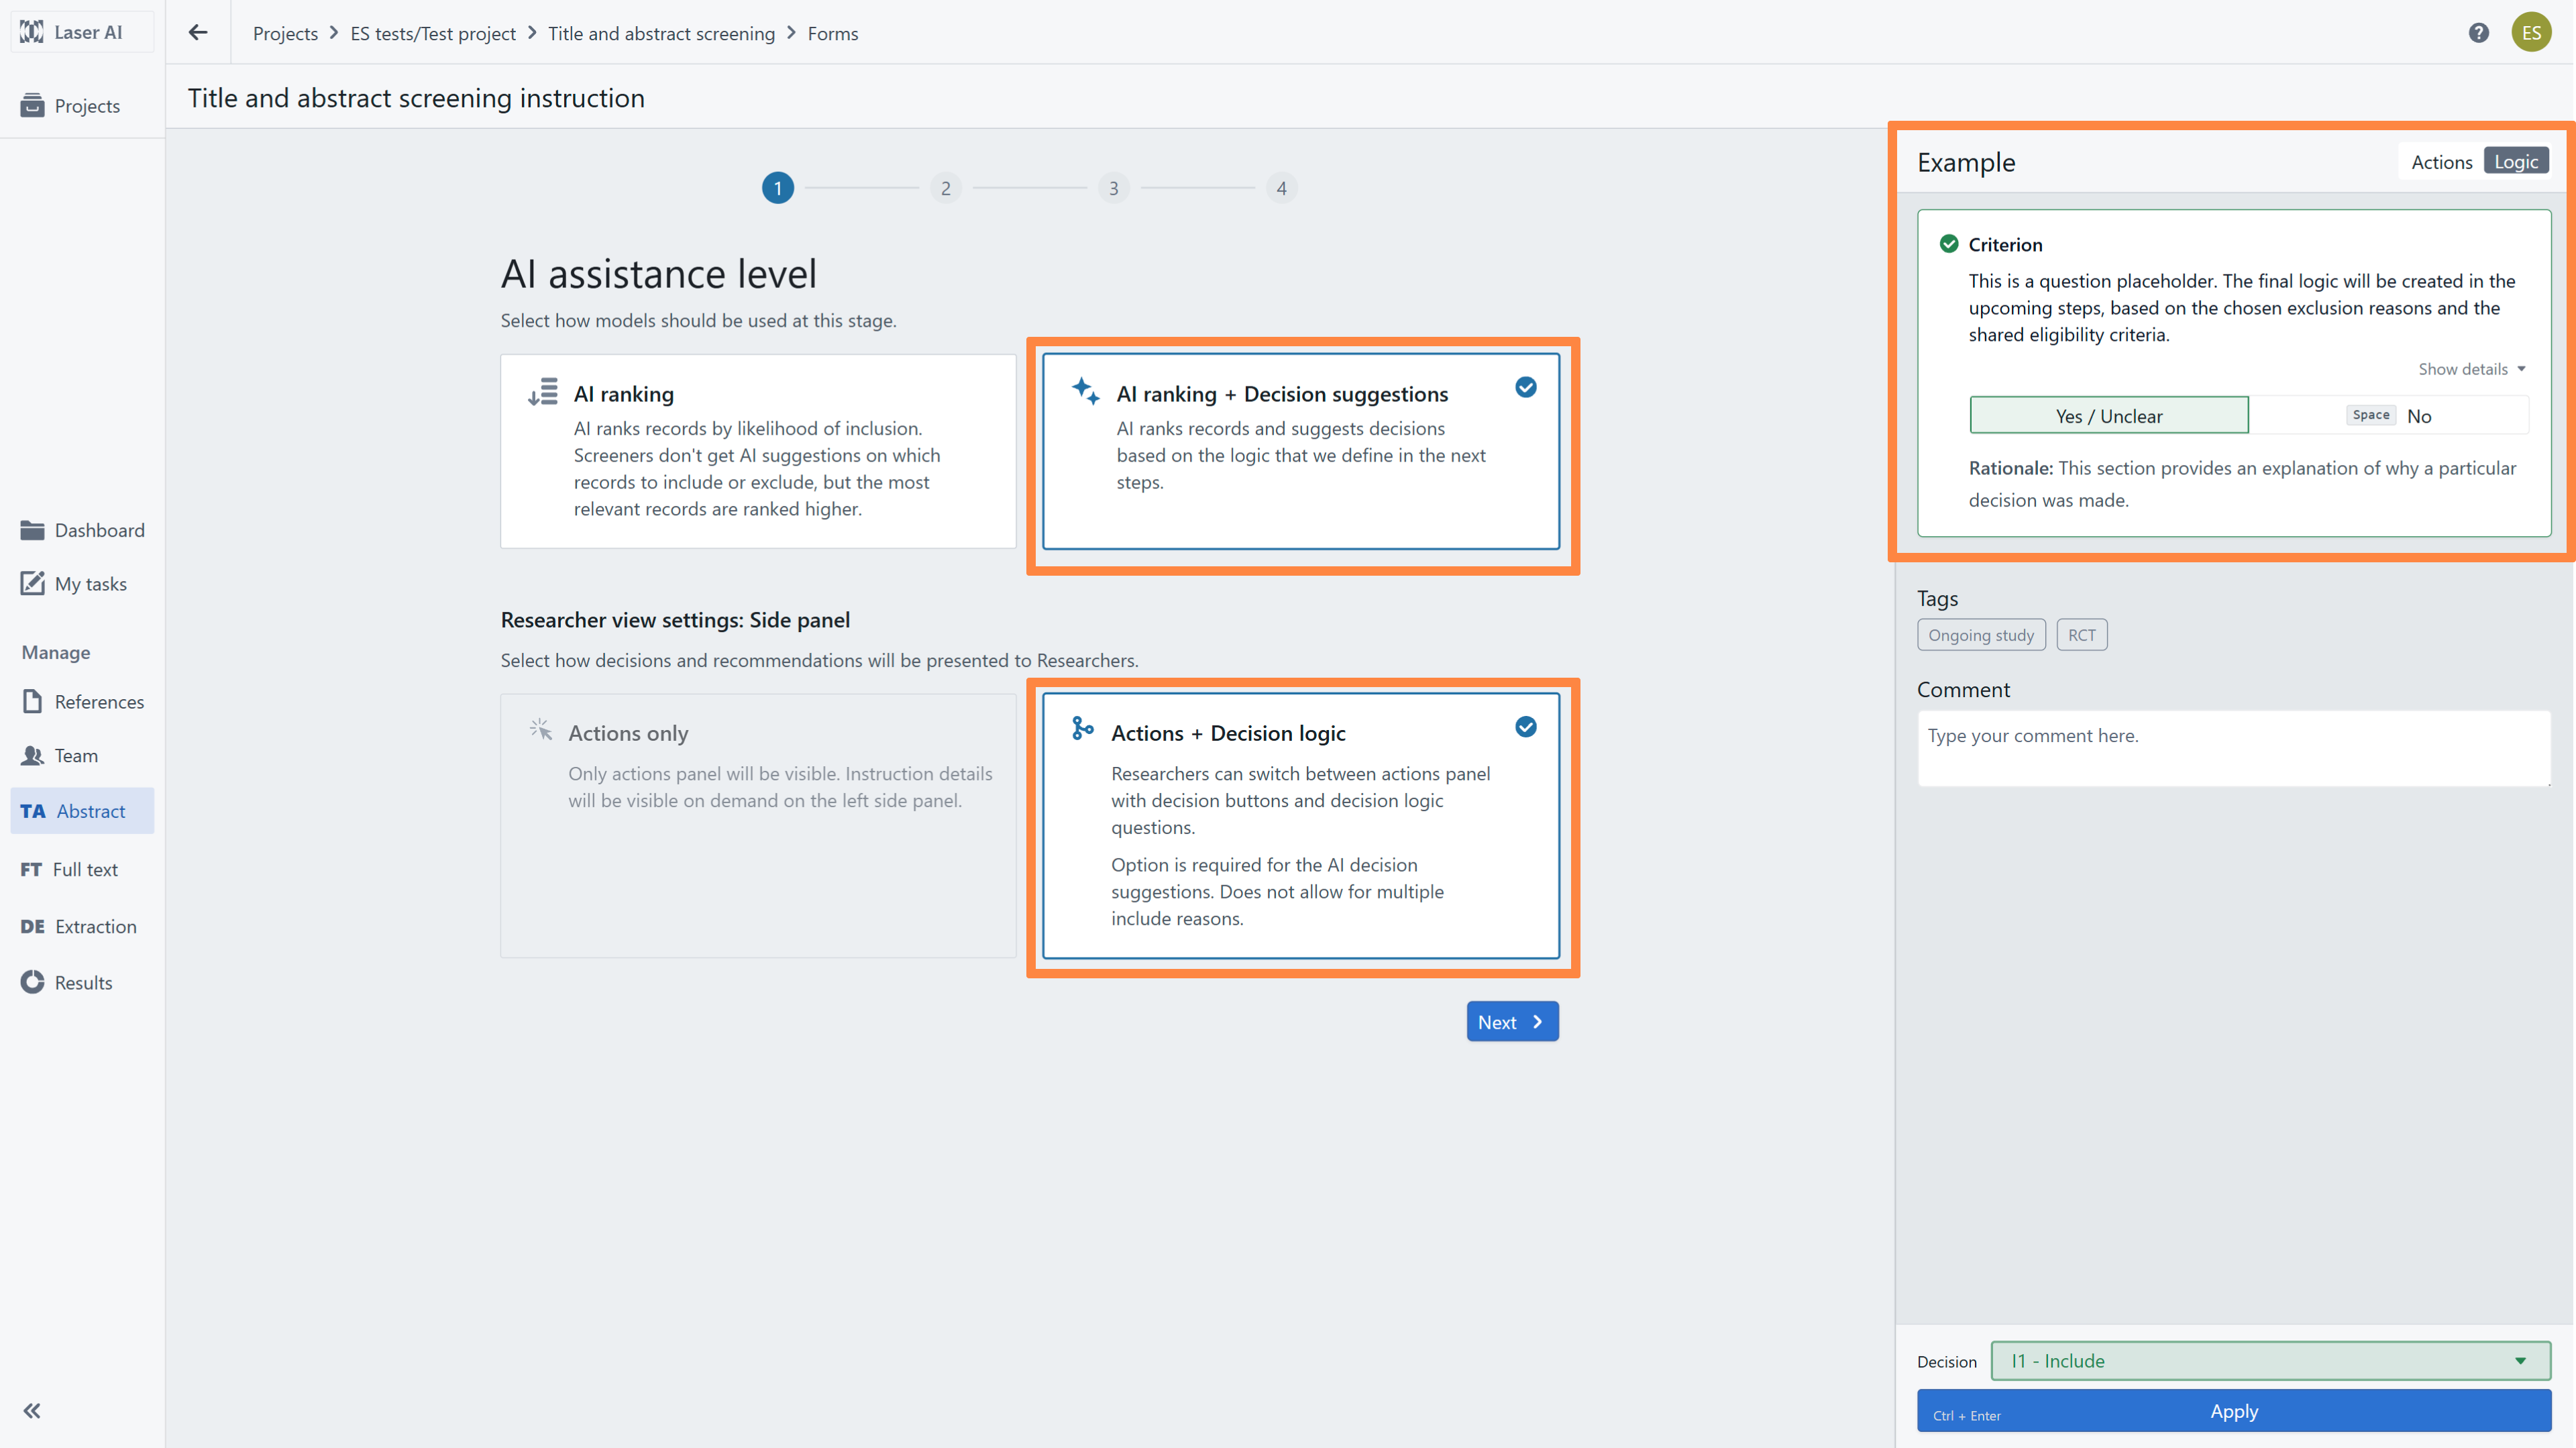
Configuring Instructions: AI Ranking (Actions Only)
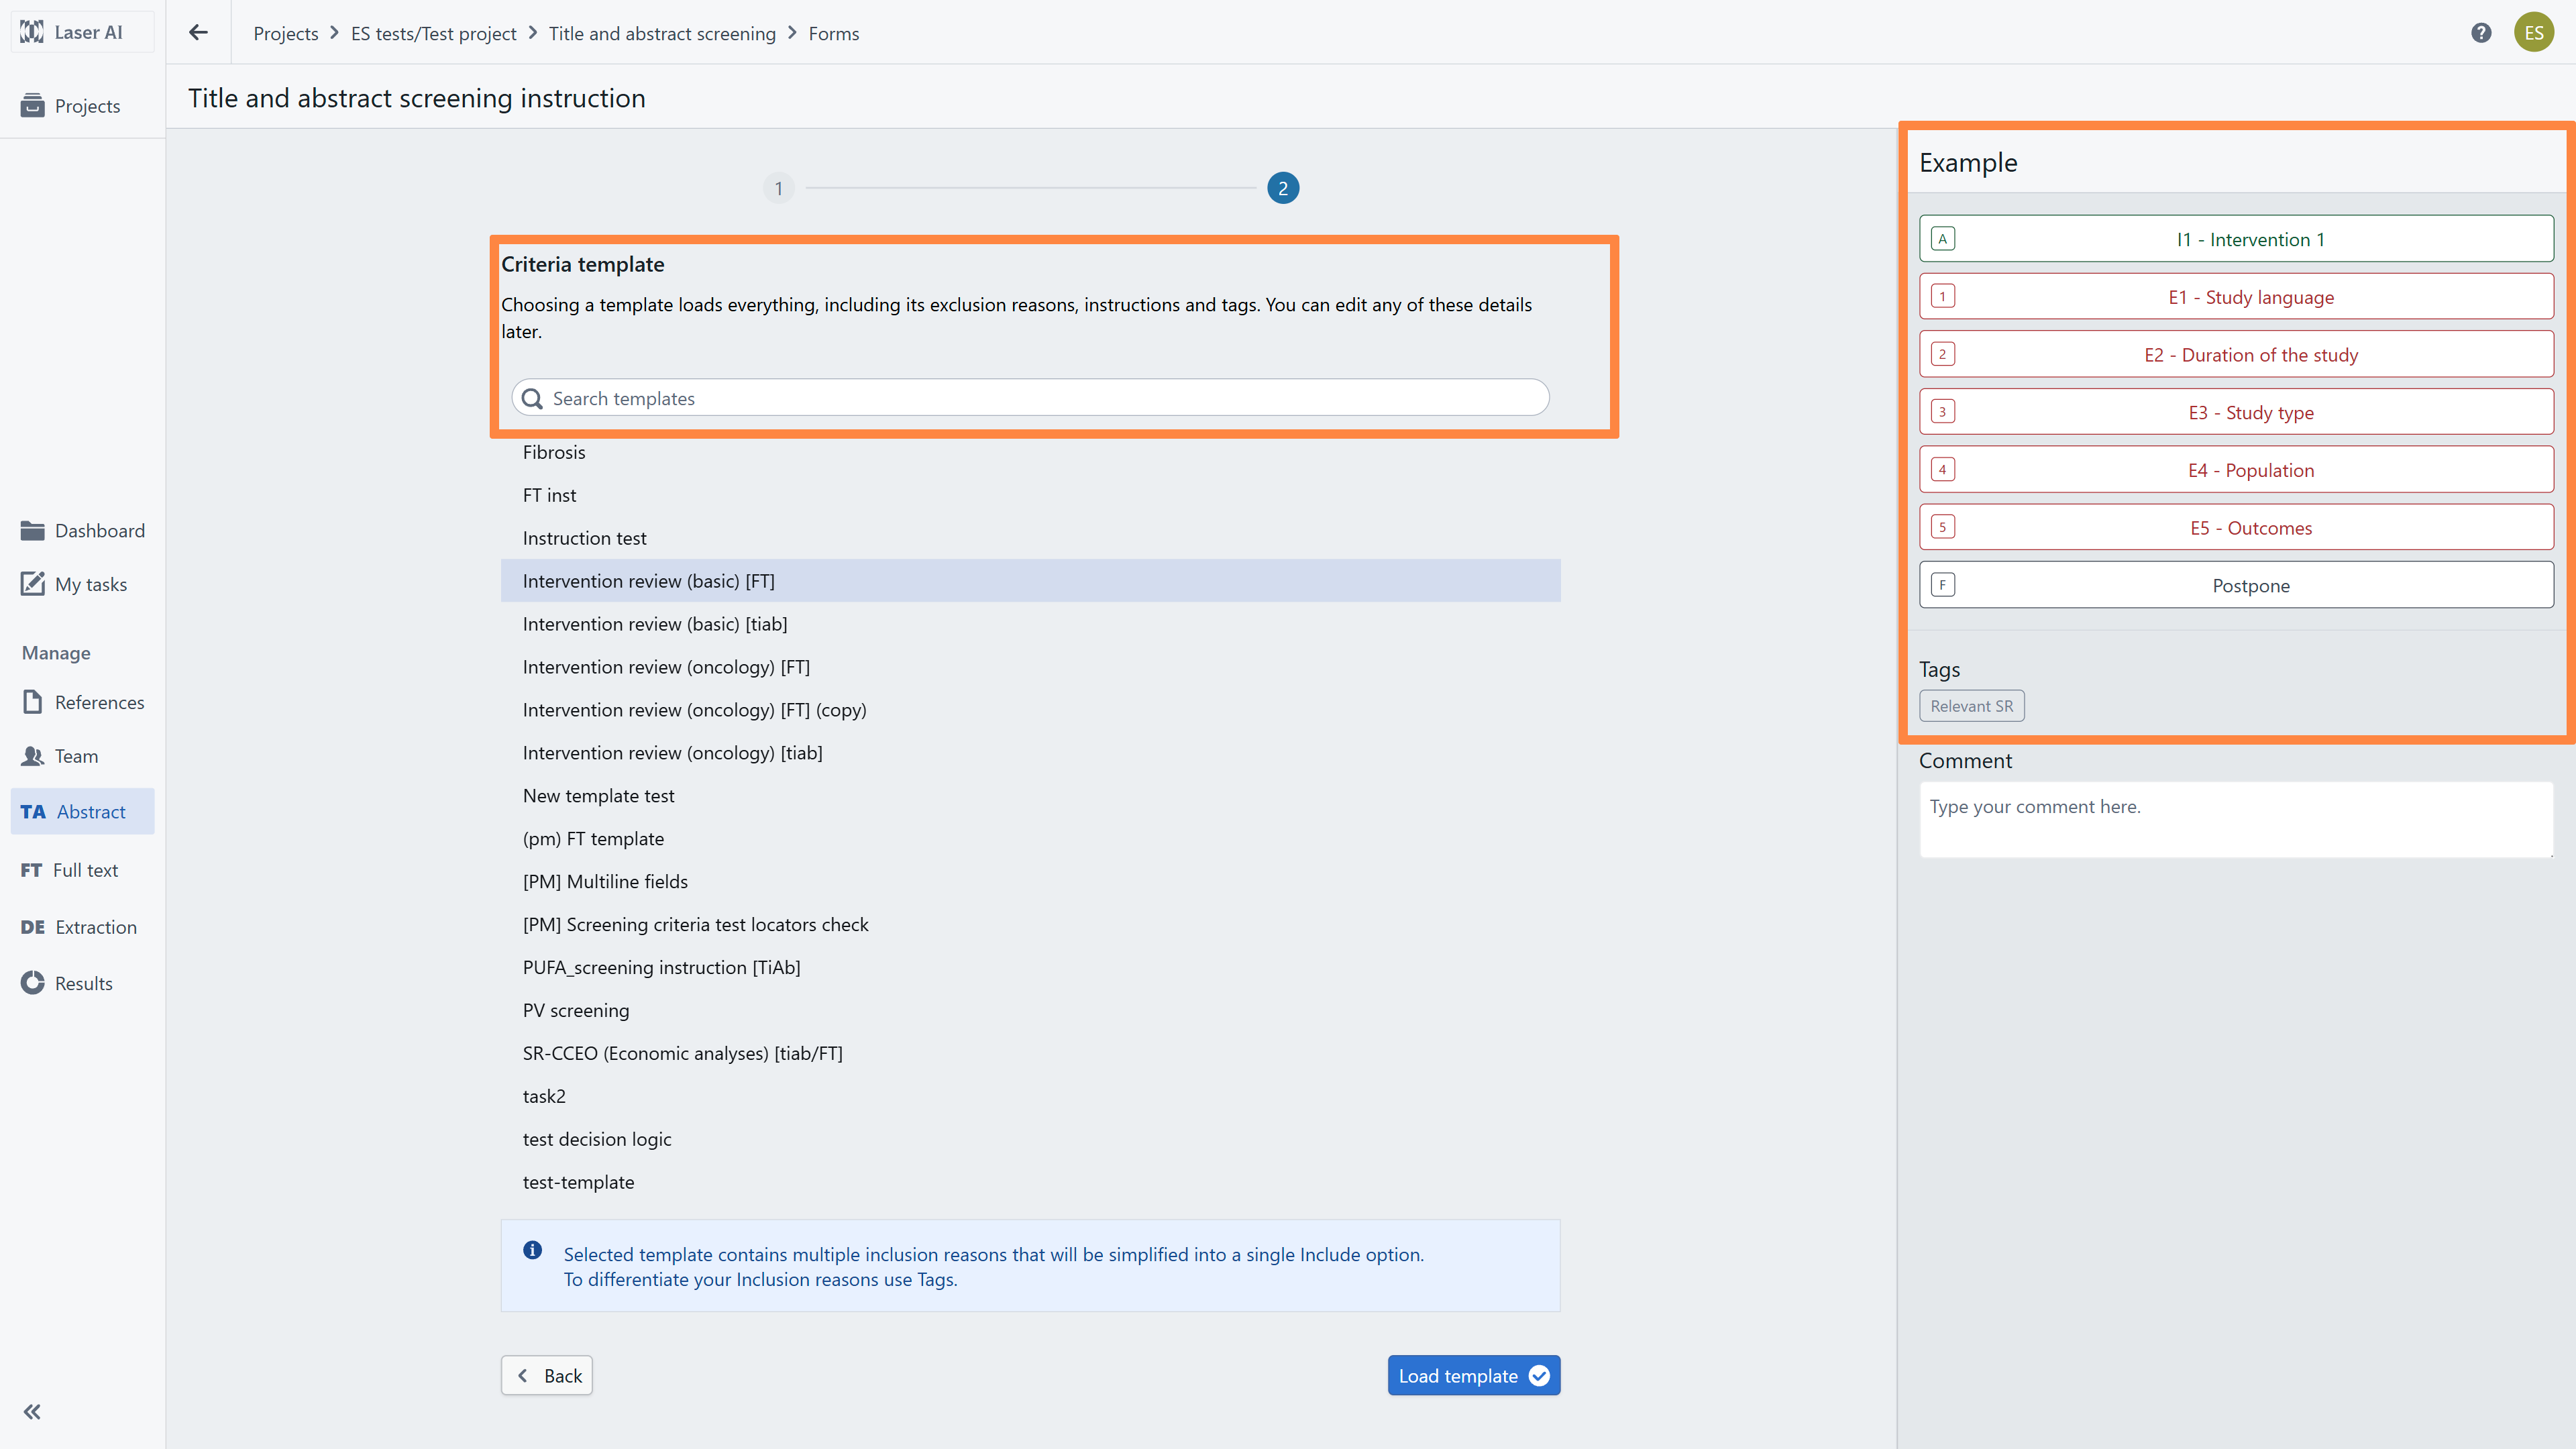
After selecting AI ranking with Actions only, choose a template from the list. Laser AI provides pre-configured templates for various project types, or you can upload a custom template previously saved within your organization. In the right panel a list of IN/OUT buttons for selected template is available.
Note: All templates remain fully editable after upload.
Configuring Instructions: AI Ranking (Actions + Decision logic)
When enabling Decision Logic alongside AI ranking, you must first set up your screening instructions using one of two methods:
Generate new instruction (Recommended for new projects): Upload your eligibility criteria to draft and refine a new set of instructions.
Load from templates (Recommended for project updates): Select and import a previously saved template from your library.
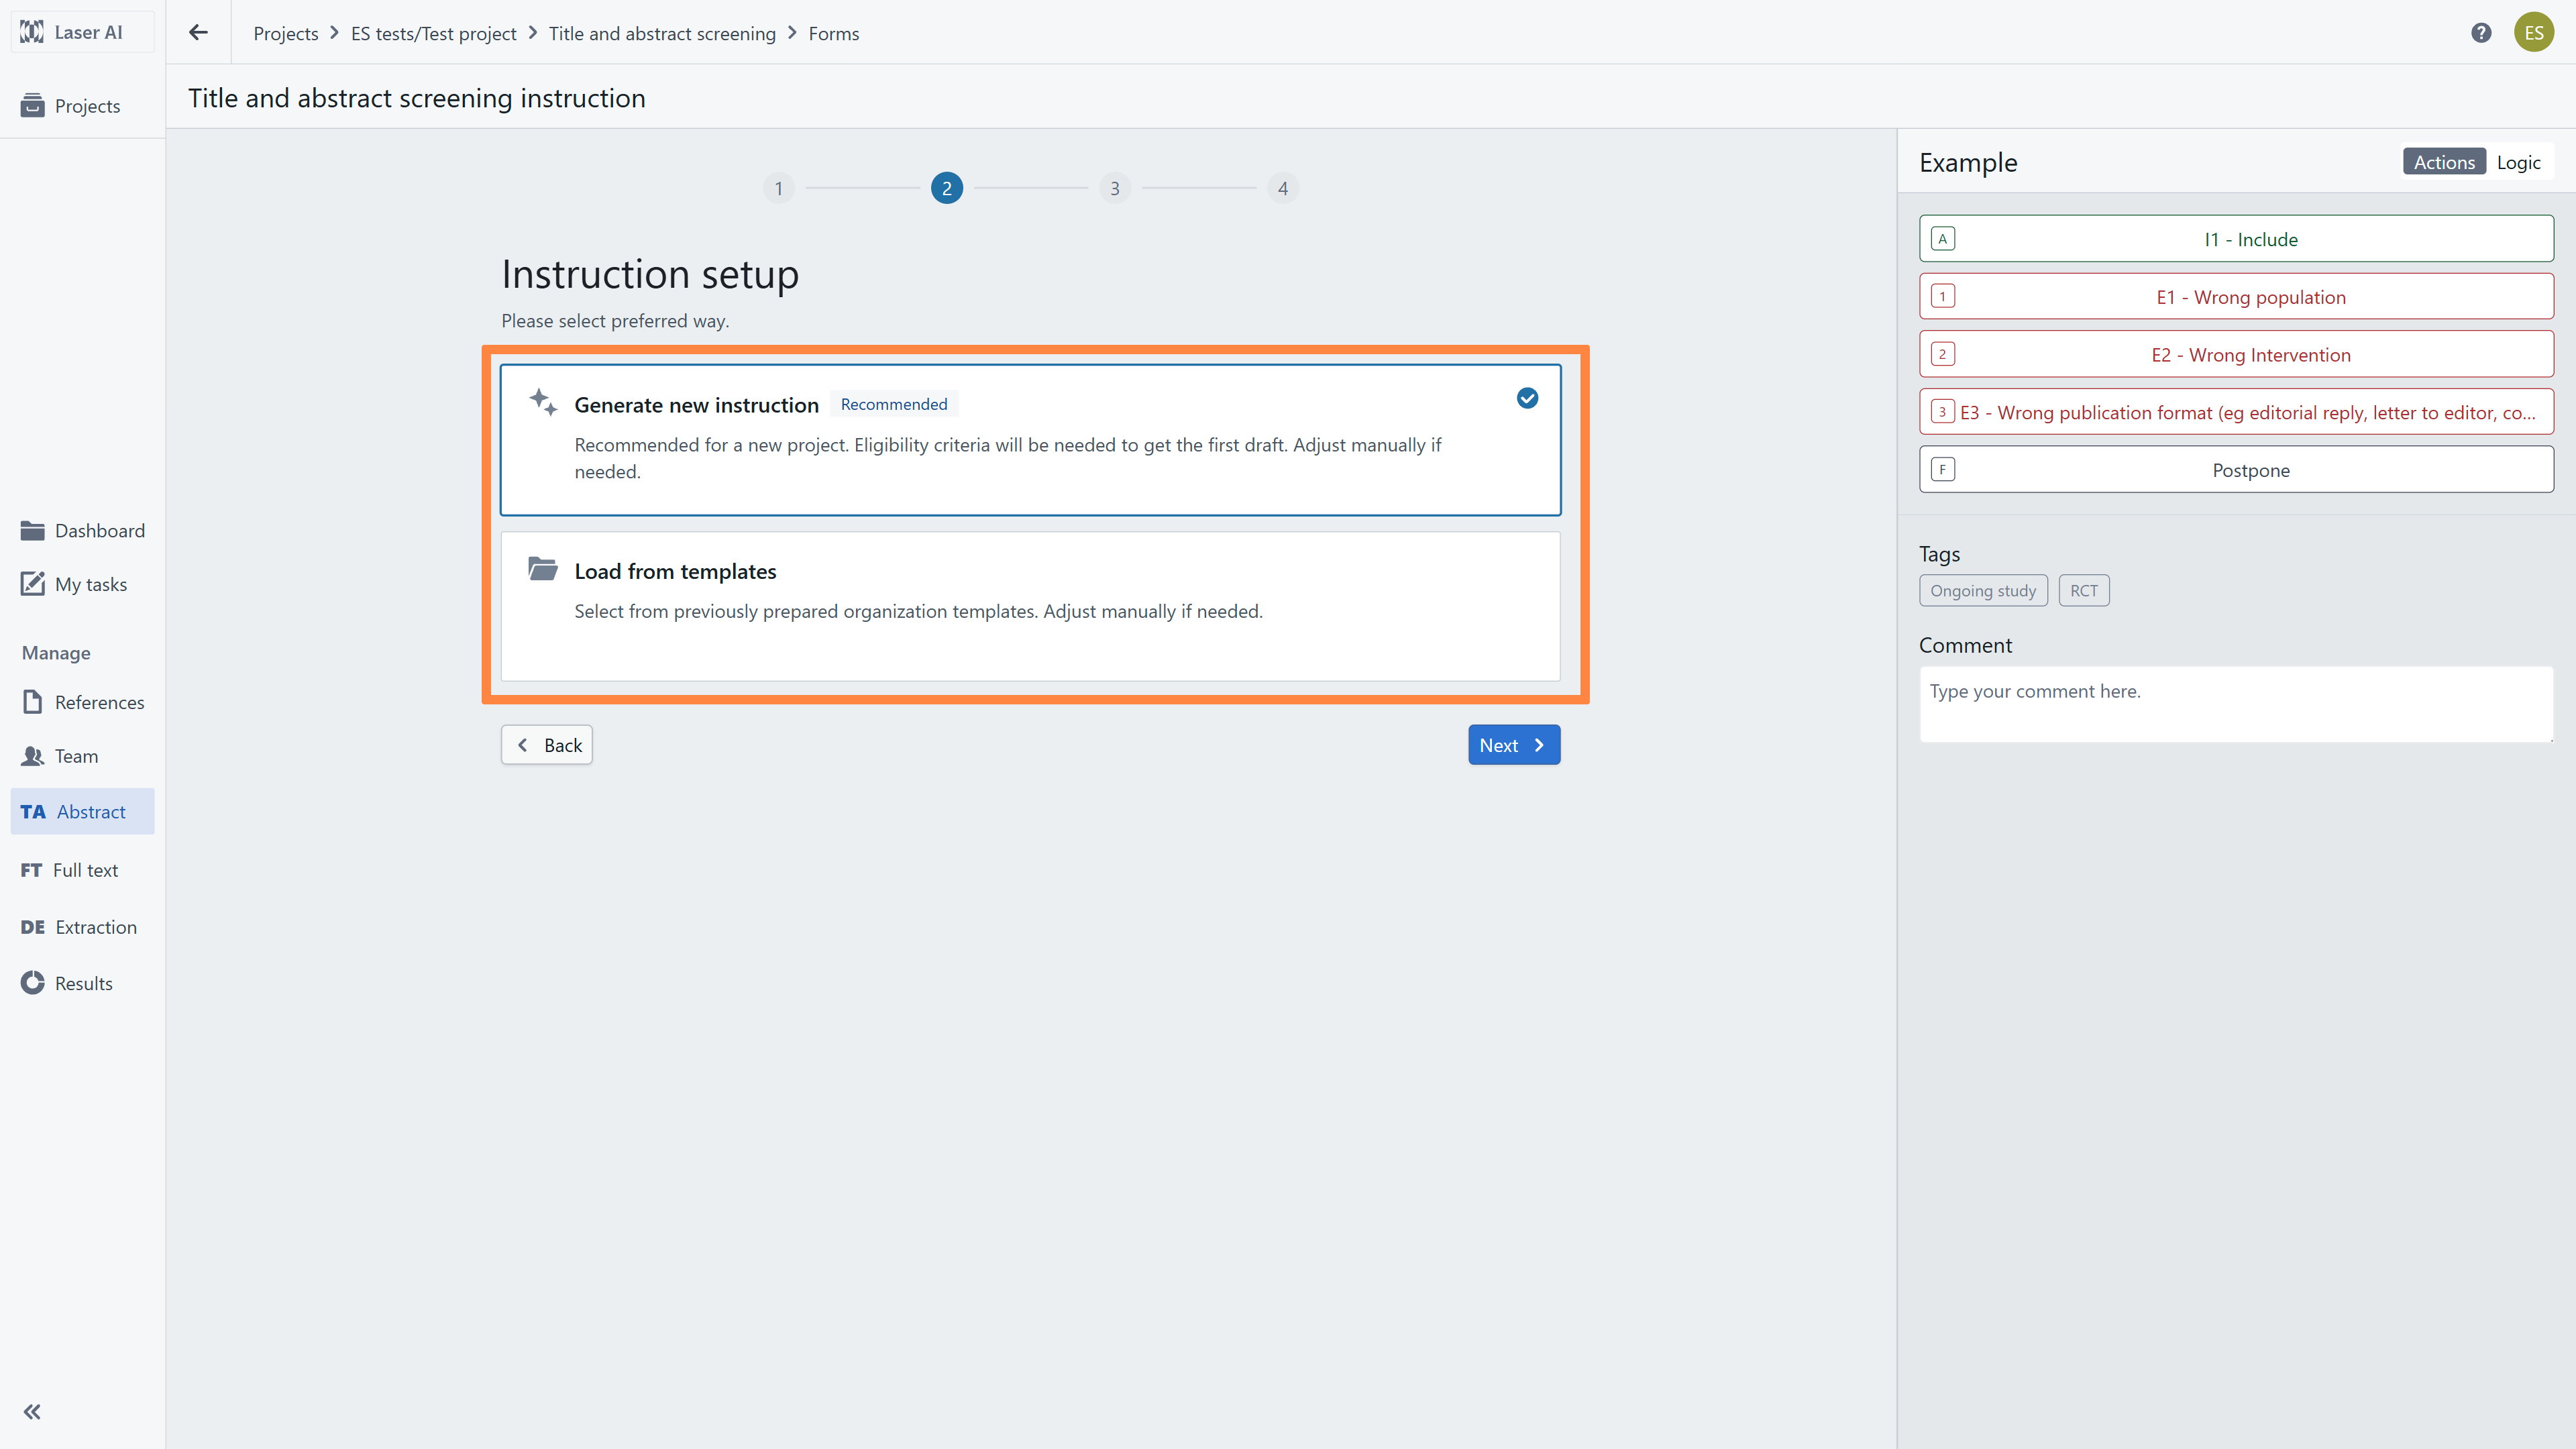
When selecting Generate new instruction, you must define your action buttons (used to tag included and excluded records):
Select Action Buttons: Choose standard IN/OUT buttons or select a pre-configured set from the list.
Review your chosen buttons in the right panel.
Note: Action buttons are flexible and remain fully editable. You can add or remove buttons in subsequent setup steps.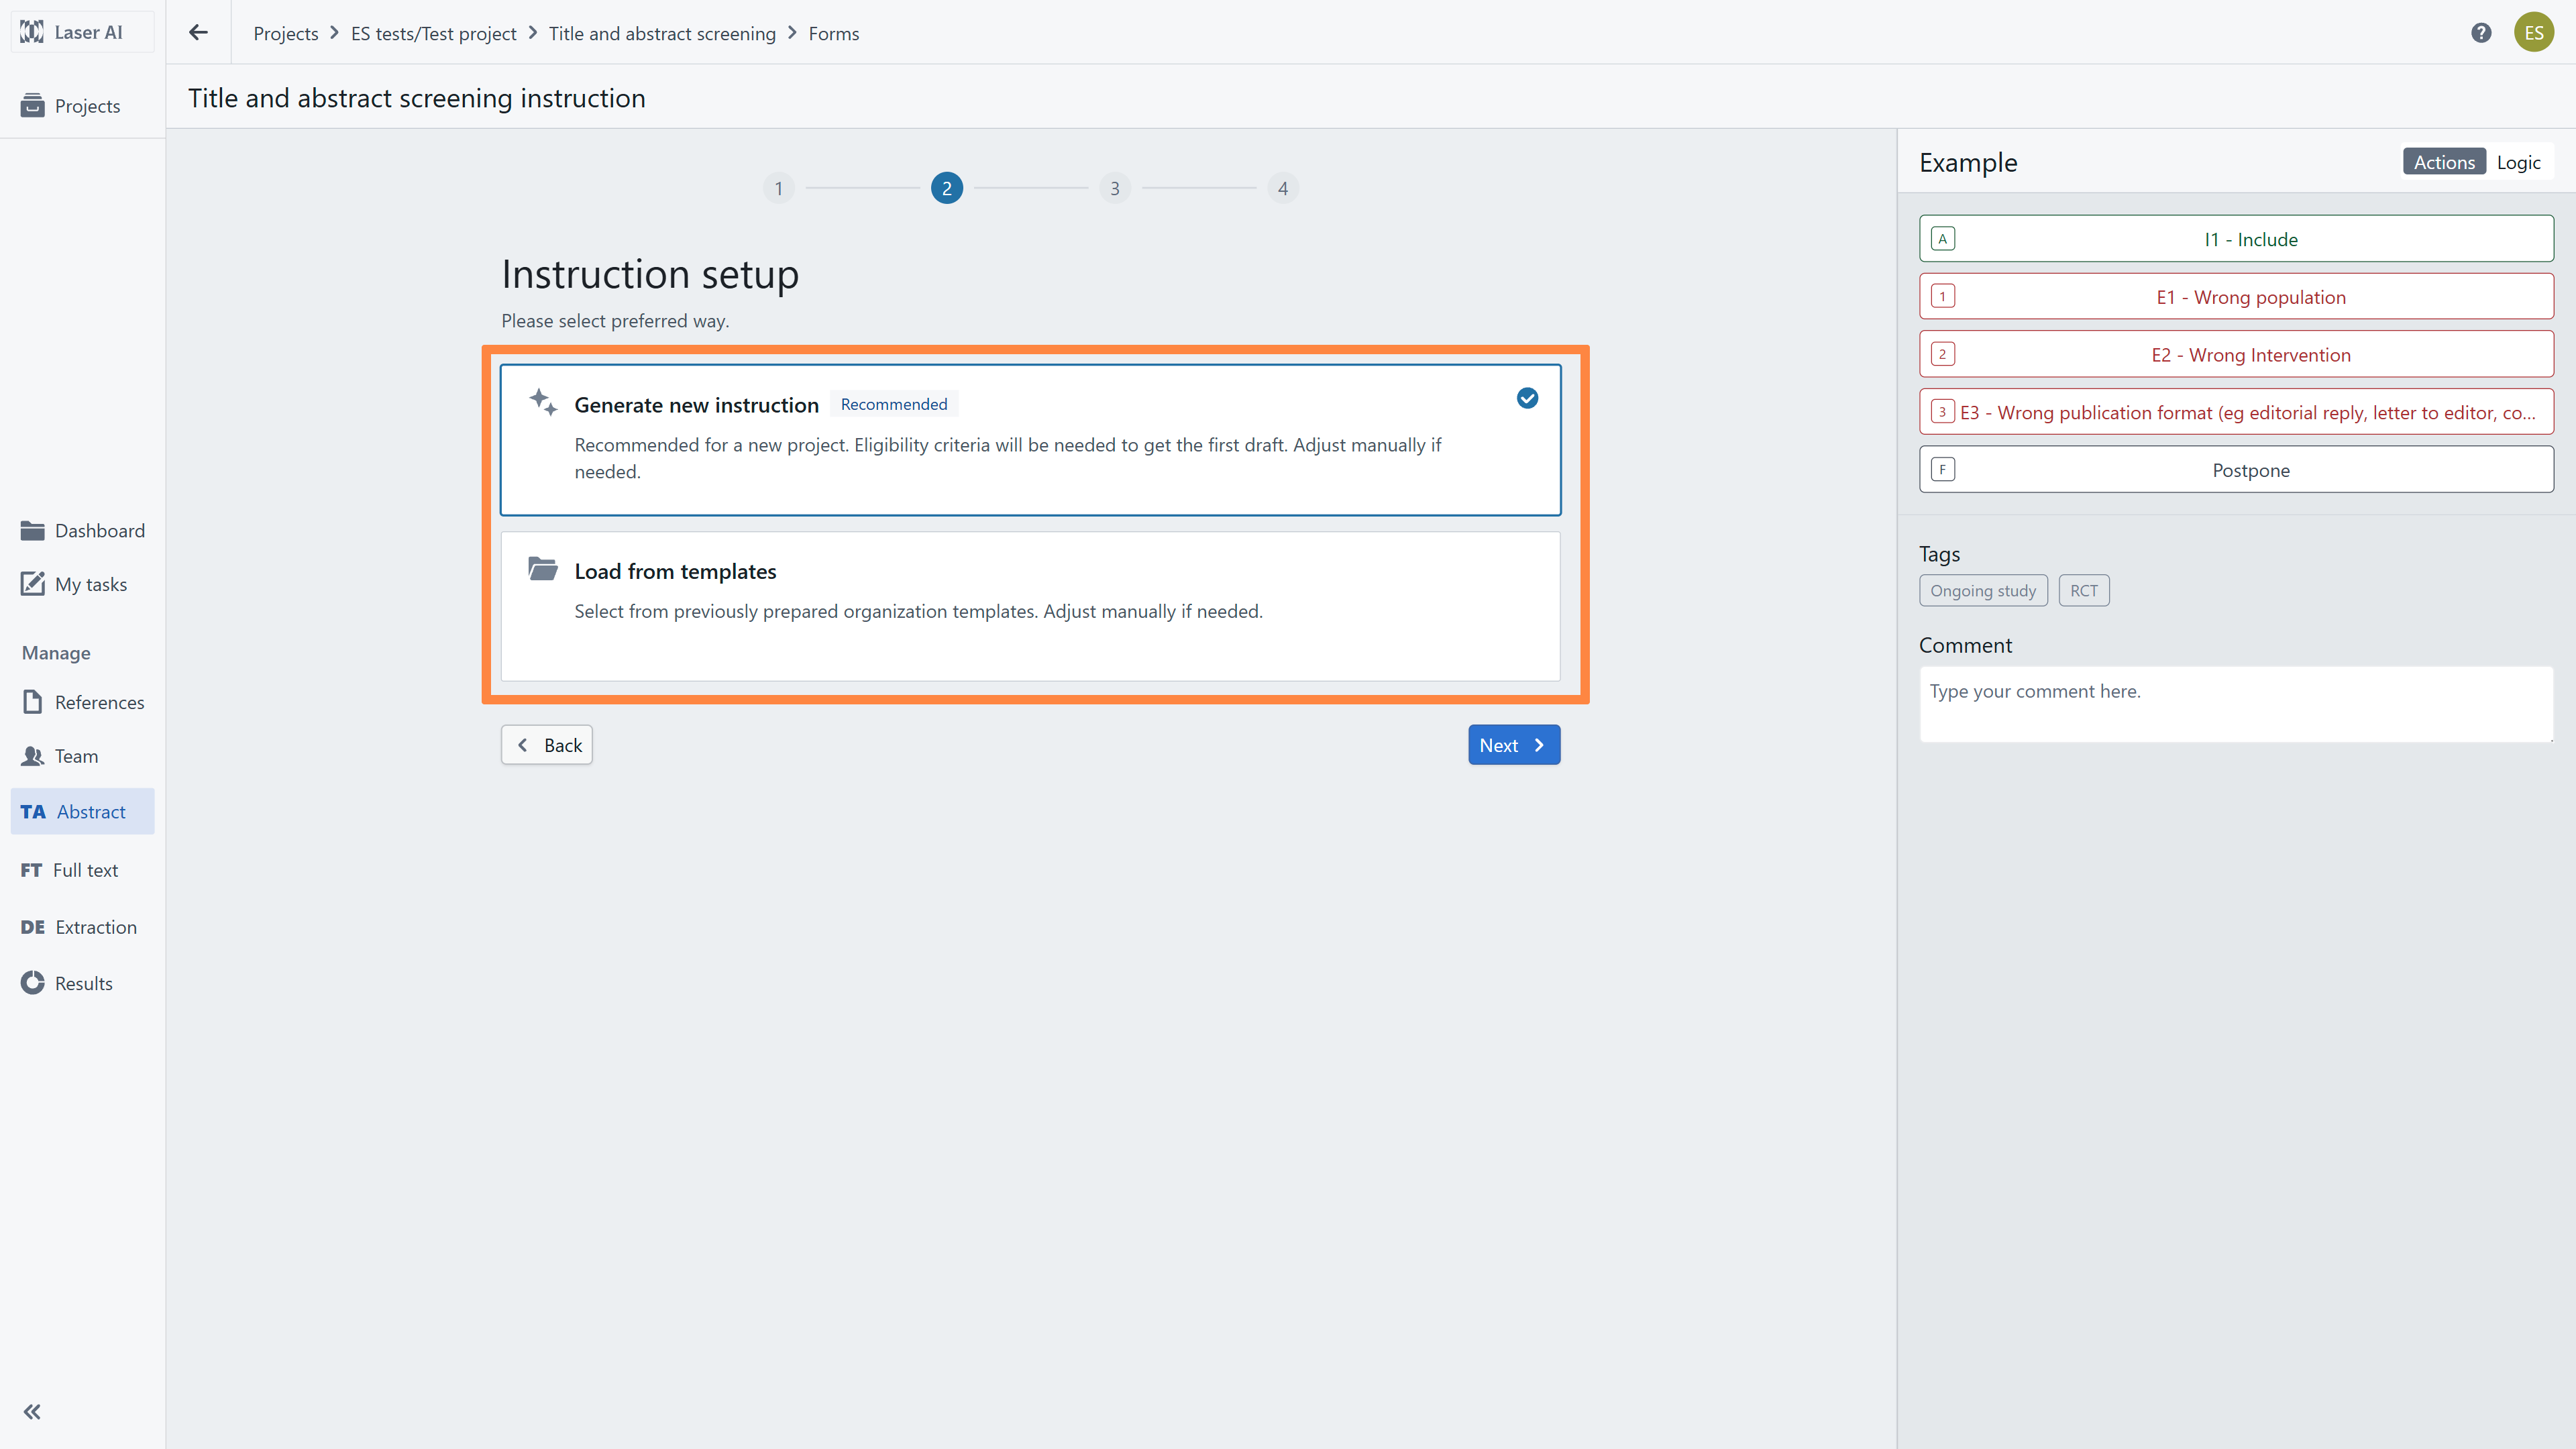
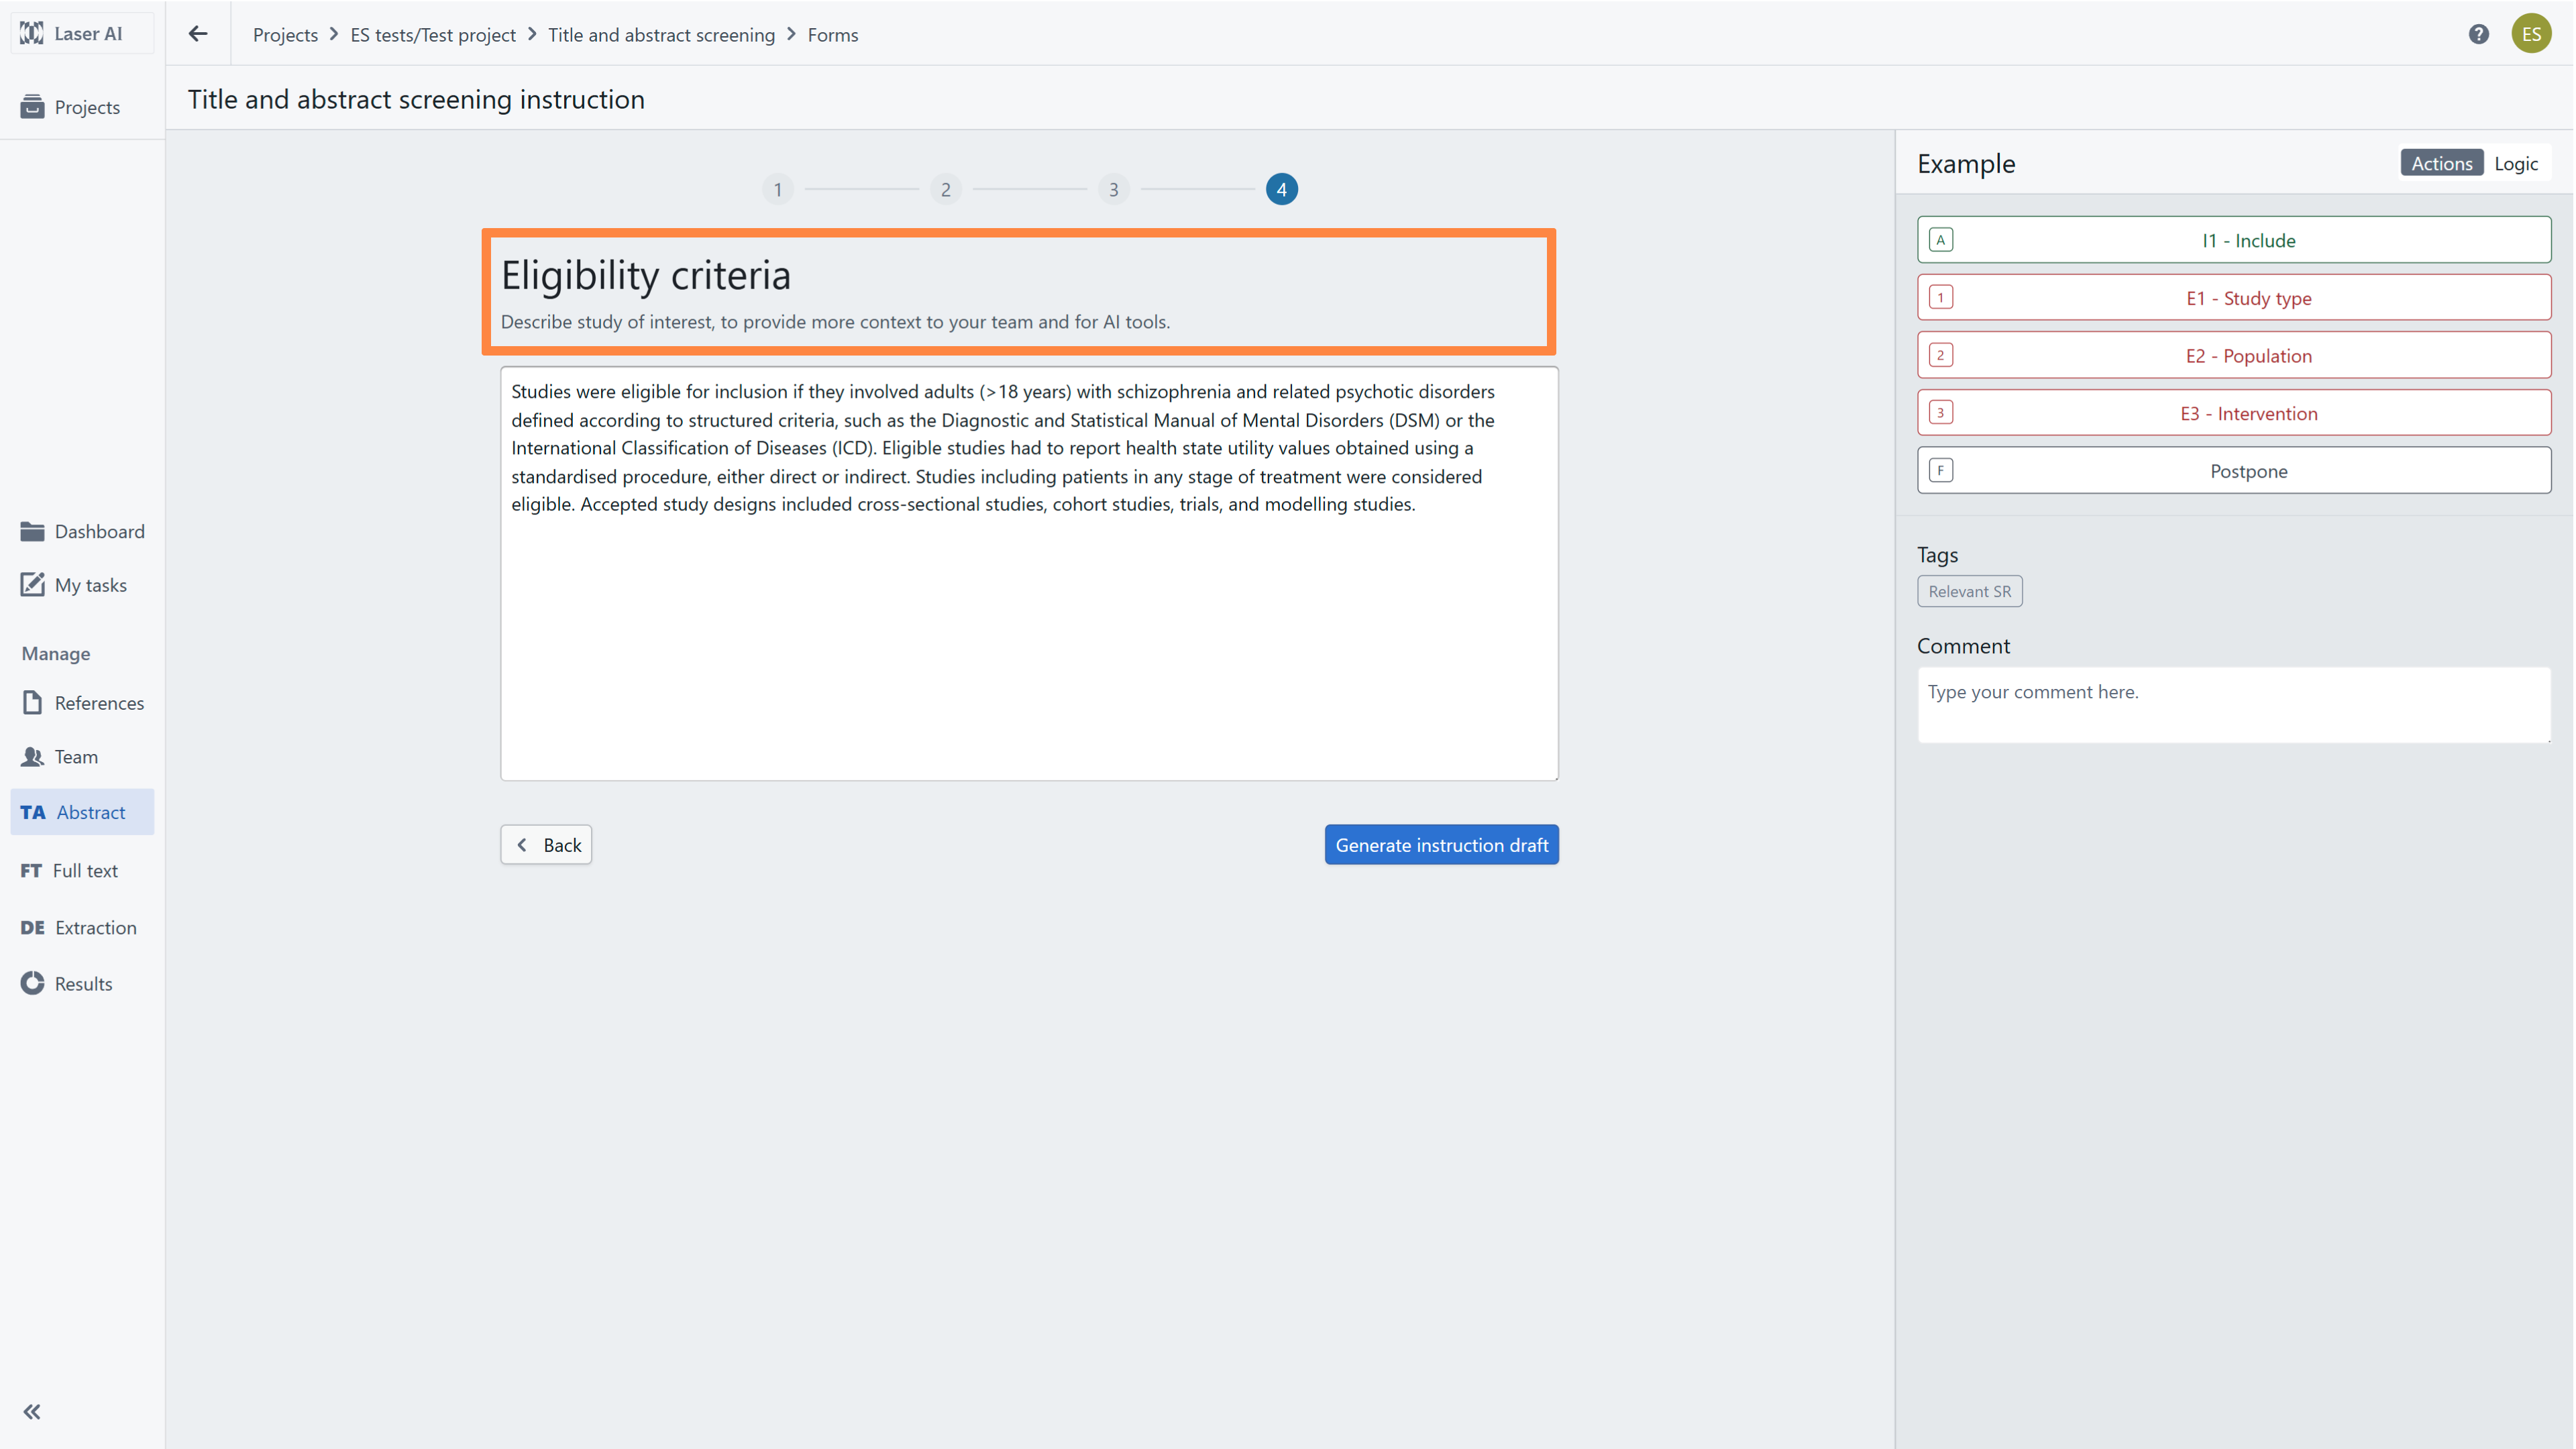
As your action buttons are selected, enter your review's eligibility criteria. The AI model will analyze this information and generate an initial instruction draft for your team to review and refine.
Configuring instructions: AI Ranking + Decision suggestions (Actions + Decision logic)
The The setup steps for AI ranking + Decision suggestions are identical to AI ranking only (when Actions and Decision Logic are enabled). The only difference is the output: selecting AI ranking + Decision suggestions provides two distinct tiers of AI support during screening.
When enabling Decision Logic alongside AI ranking, you must first set up your screening instructions using one of two methods:
Generate new instruction (Recommended for new projects): Upload your eligibility criteria to draft and refine a new set of instructions.
Load from templates (Recommended for project updates): Select and import a previously saved template from your library.
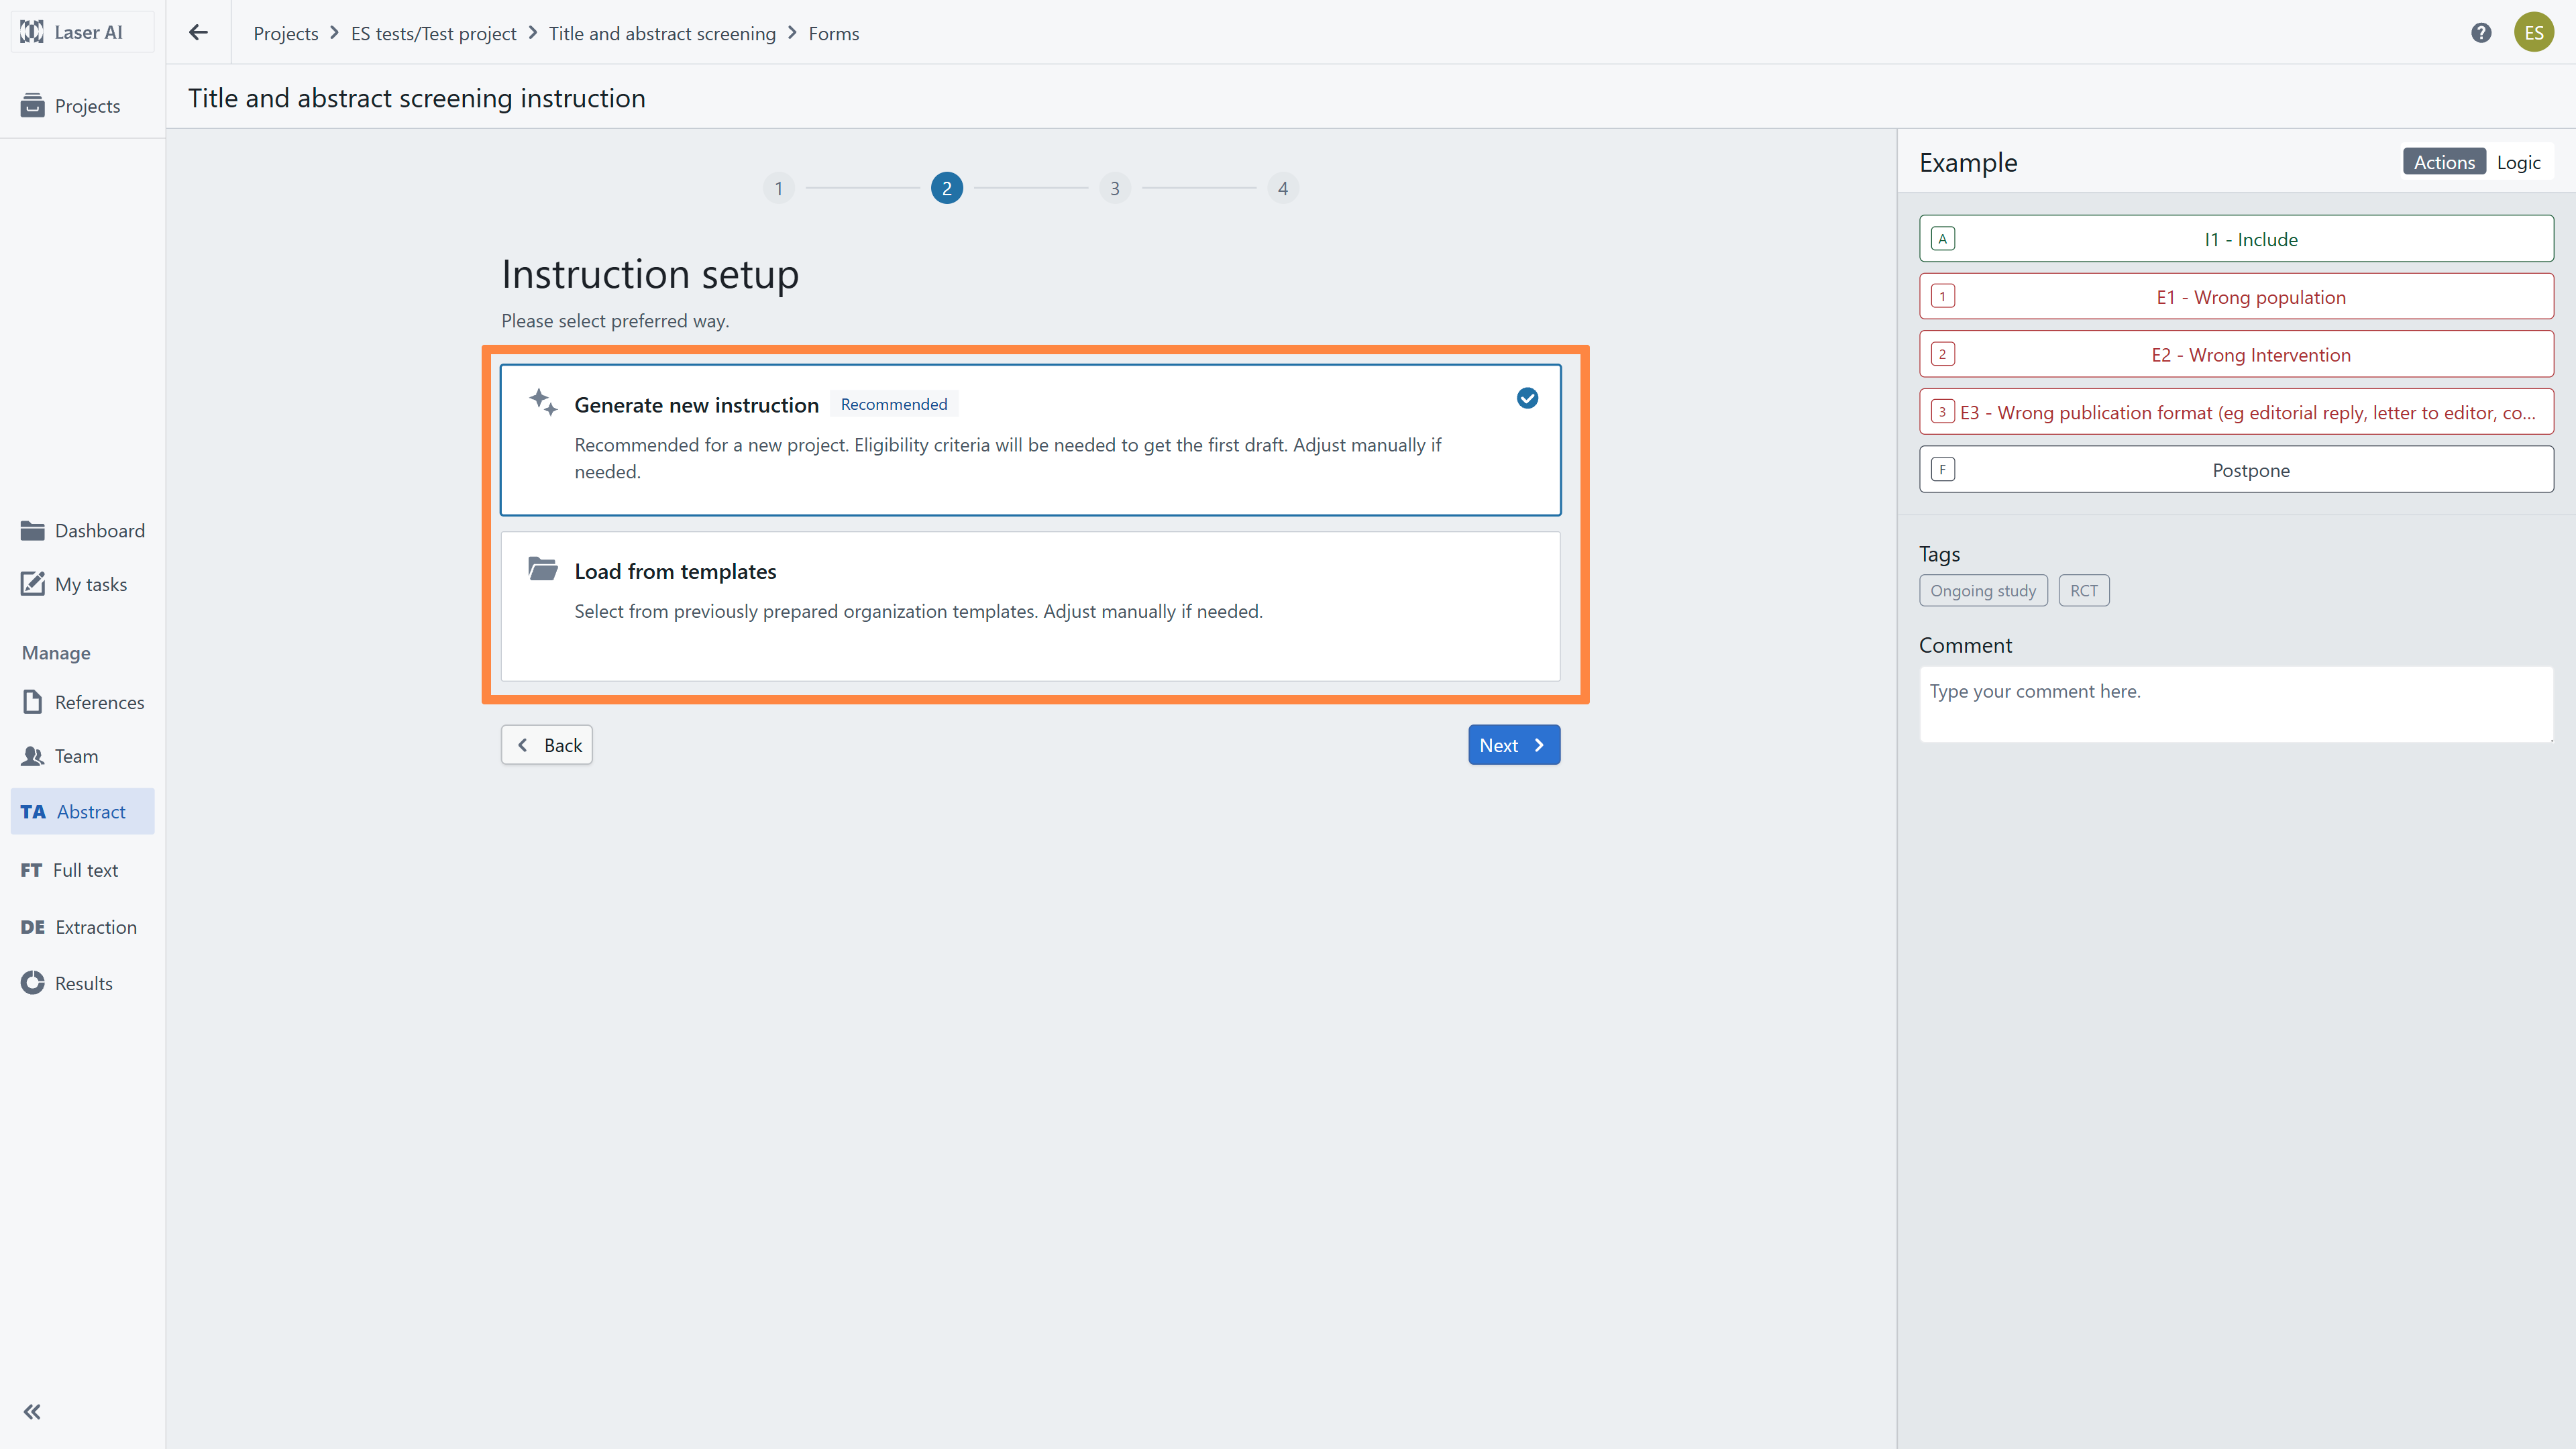
When selecting Generate new instruction, you must define your action buttons (used to tag included and excluded records):
Select Action Buttons: Choose standard IN/OUT buttons or select a pre-configured set from the list.
Preview Selection: Review your chosen buttons in the right panel.
Note: Action buttons are flexible and remain fully editable. You can add or remove buttons in subsequent setup steps.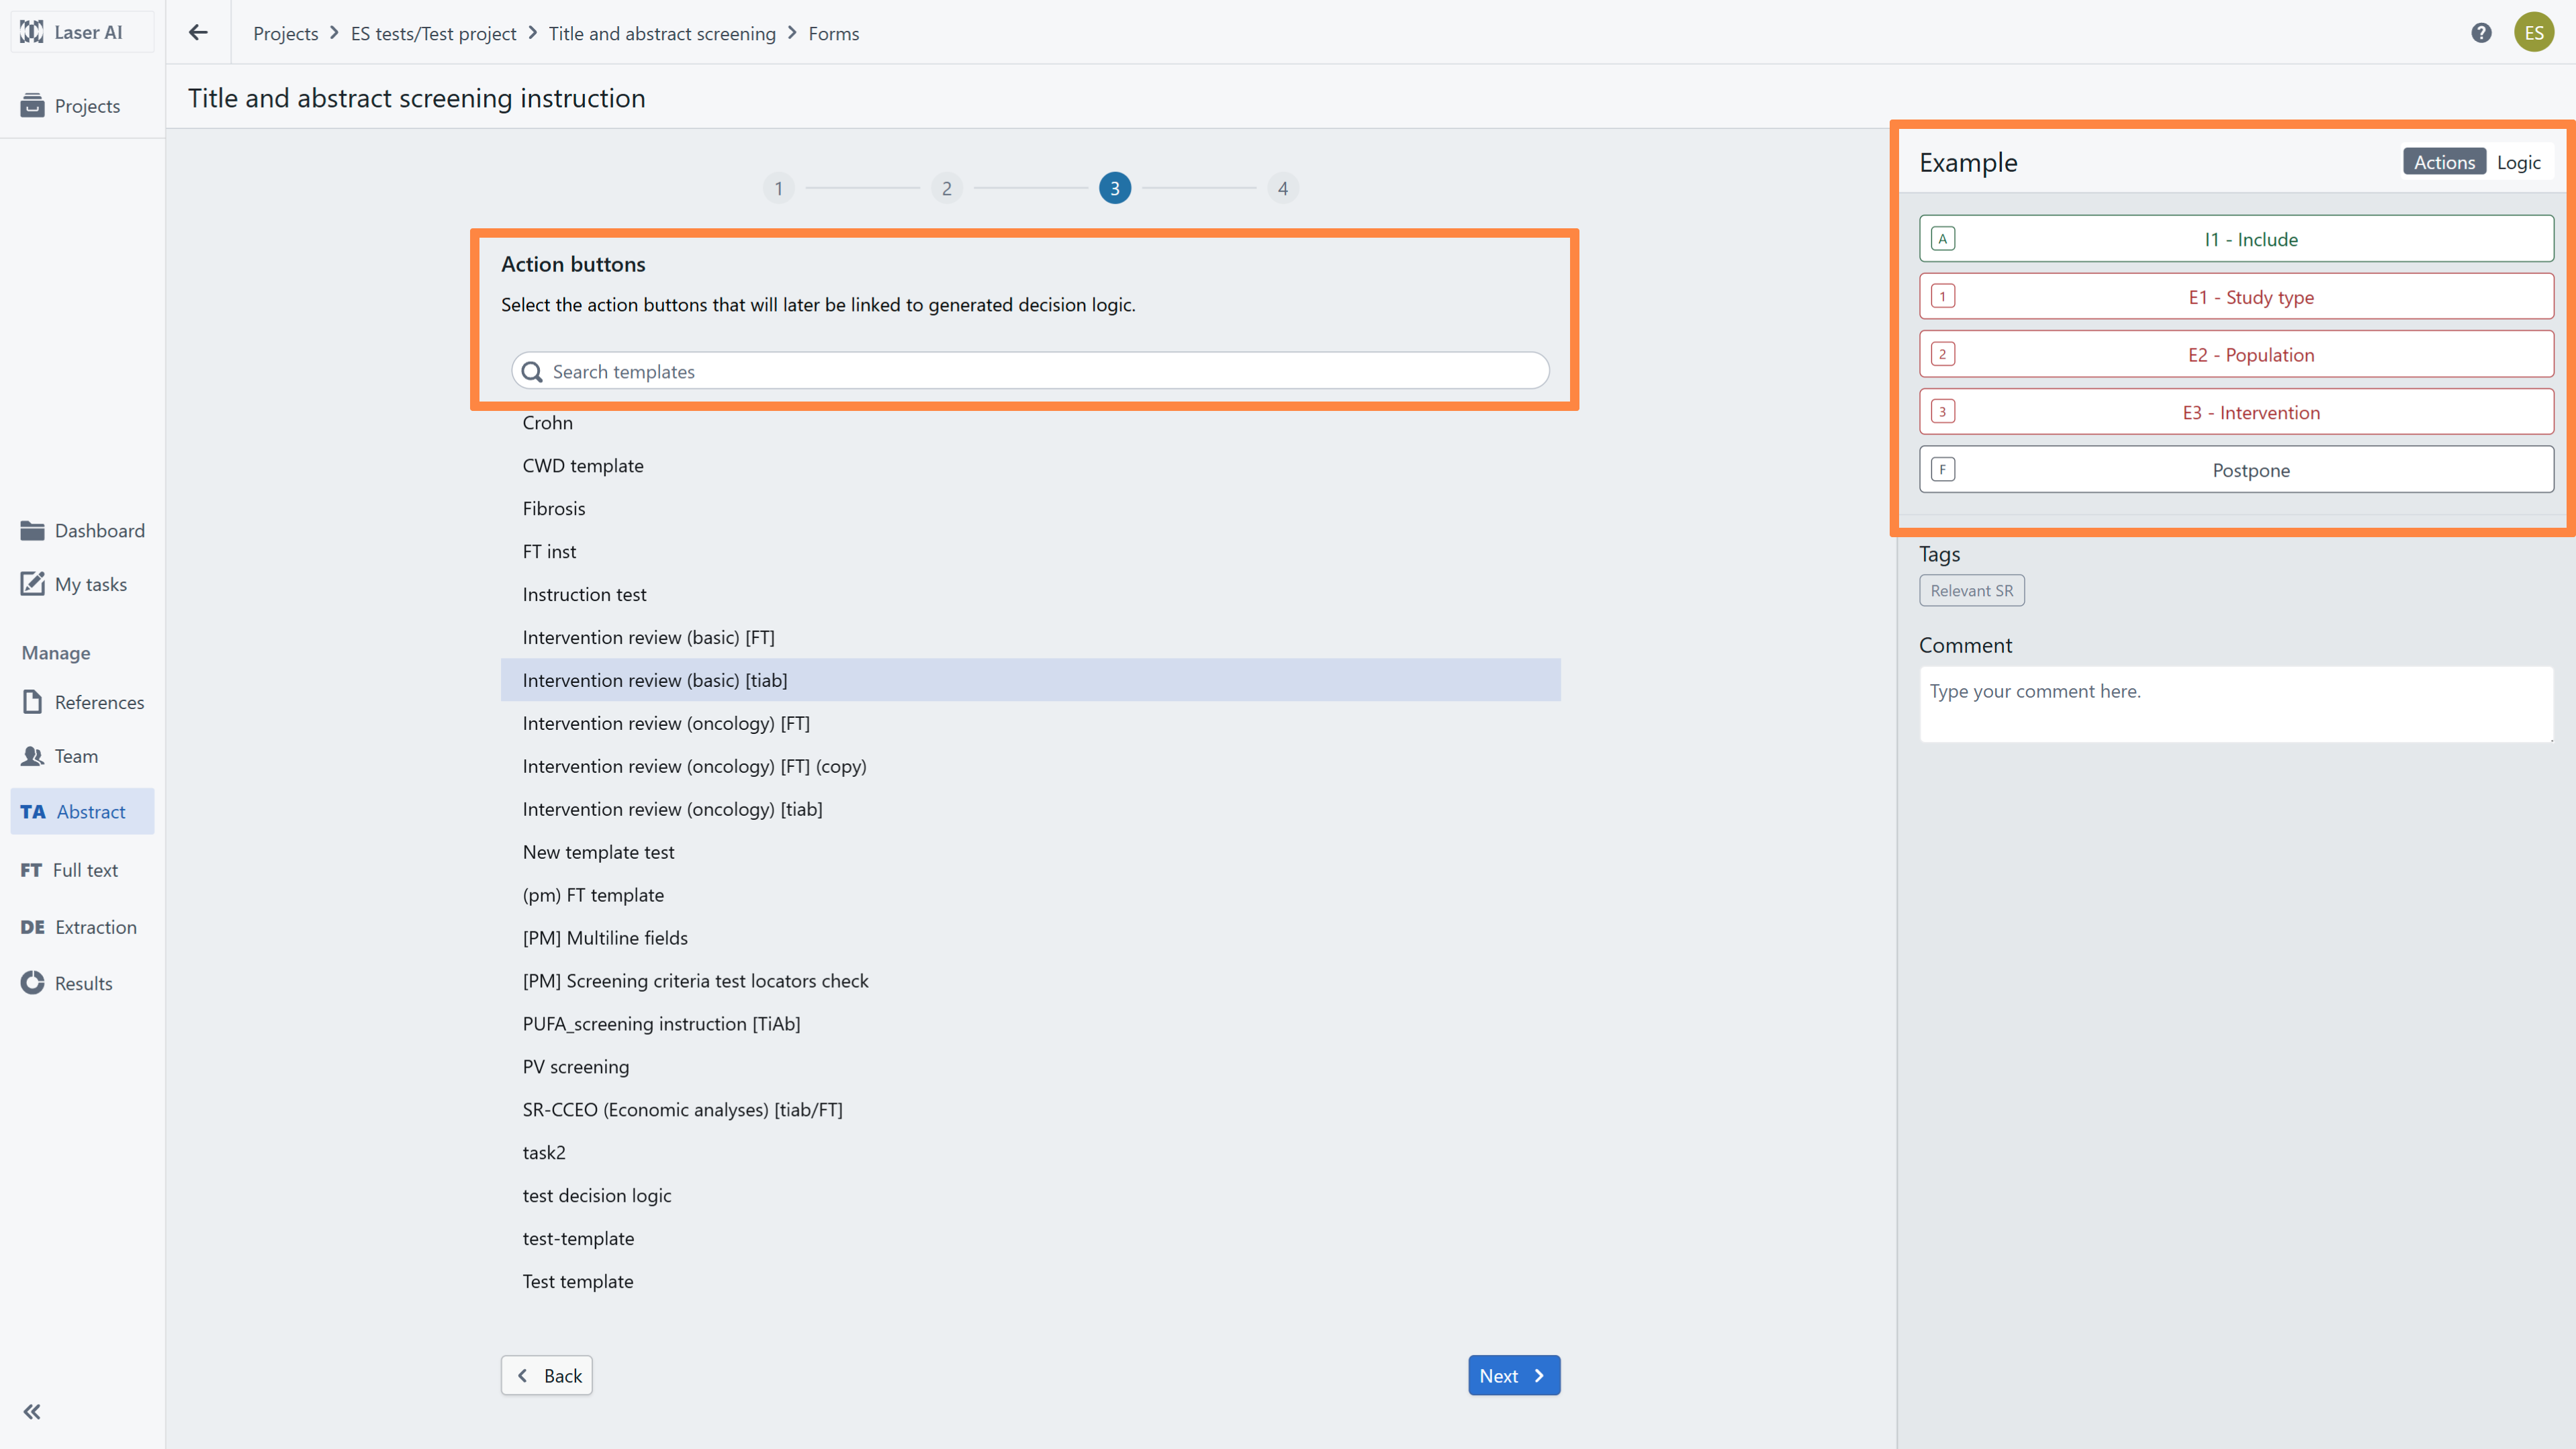
As your action buttons are selected, enter your review's eligibility criteria. The AI model will analyze this information and generate an initial instruction draft for your team to review and refine.
The Instruction configuration consists of four core tabs:
Decision logic: Defines the step-by-step logic the human and/or AI model follows when suggesting IN/OUT decisions. Use this tab to provide detailed prompts to the model and map specific decisions and tags to each step.
Tags: Allows you to create and manage custom labels for tagging studies. Use tags to add context to records during screening and filter studies during data extraction or analysis.
Actions: Configures the screening criteria (inclusion and exclusion reasons) visible to researchers during screening.
General Settings: Manages high-level configurations for the instruction set, including name, description, and baseline AI behavior settings.
Below you can find detailed information about each tab.
If the generated Decision Flow requires major adjustments, click Regenerate at the bottom of the page to create a new draft.
Once your instructions are ready, choose how to save your work:
Save as a draft: Save your current progress to edit or review later.
Save and apply: Publish this set as the final version for your active project.
Save as a template: Select Templates > Save as a template to reuse these instructions in future systematic review projects.
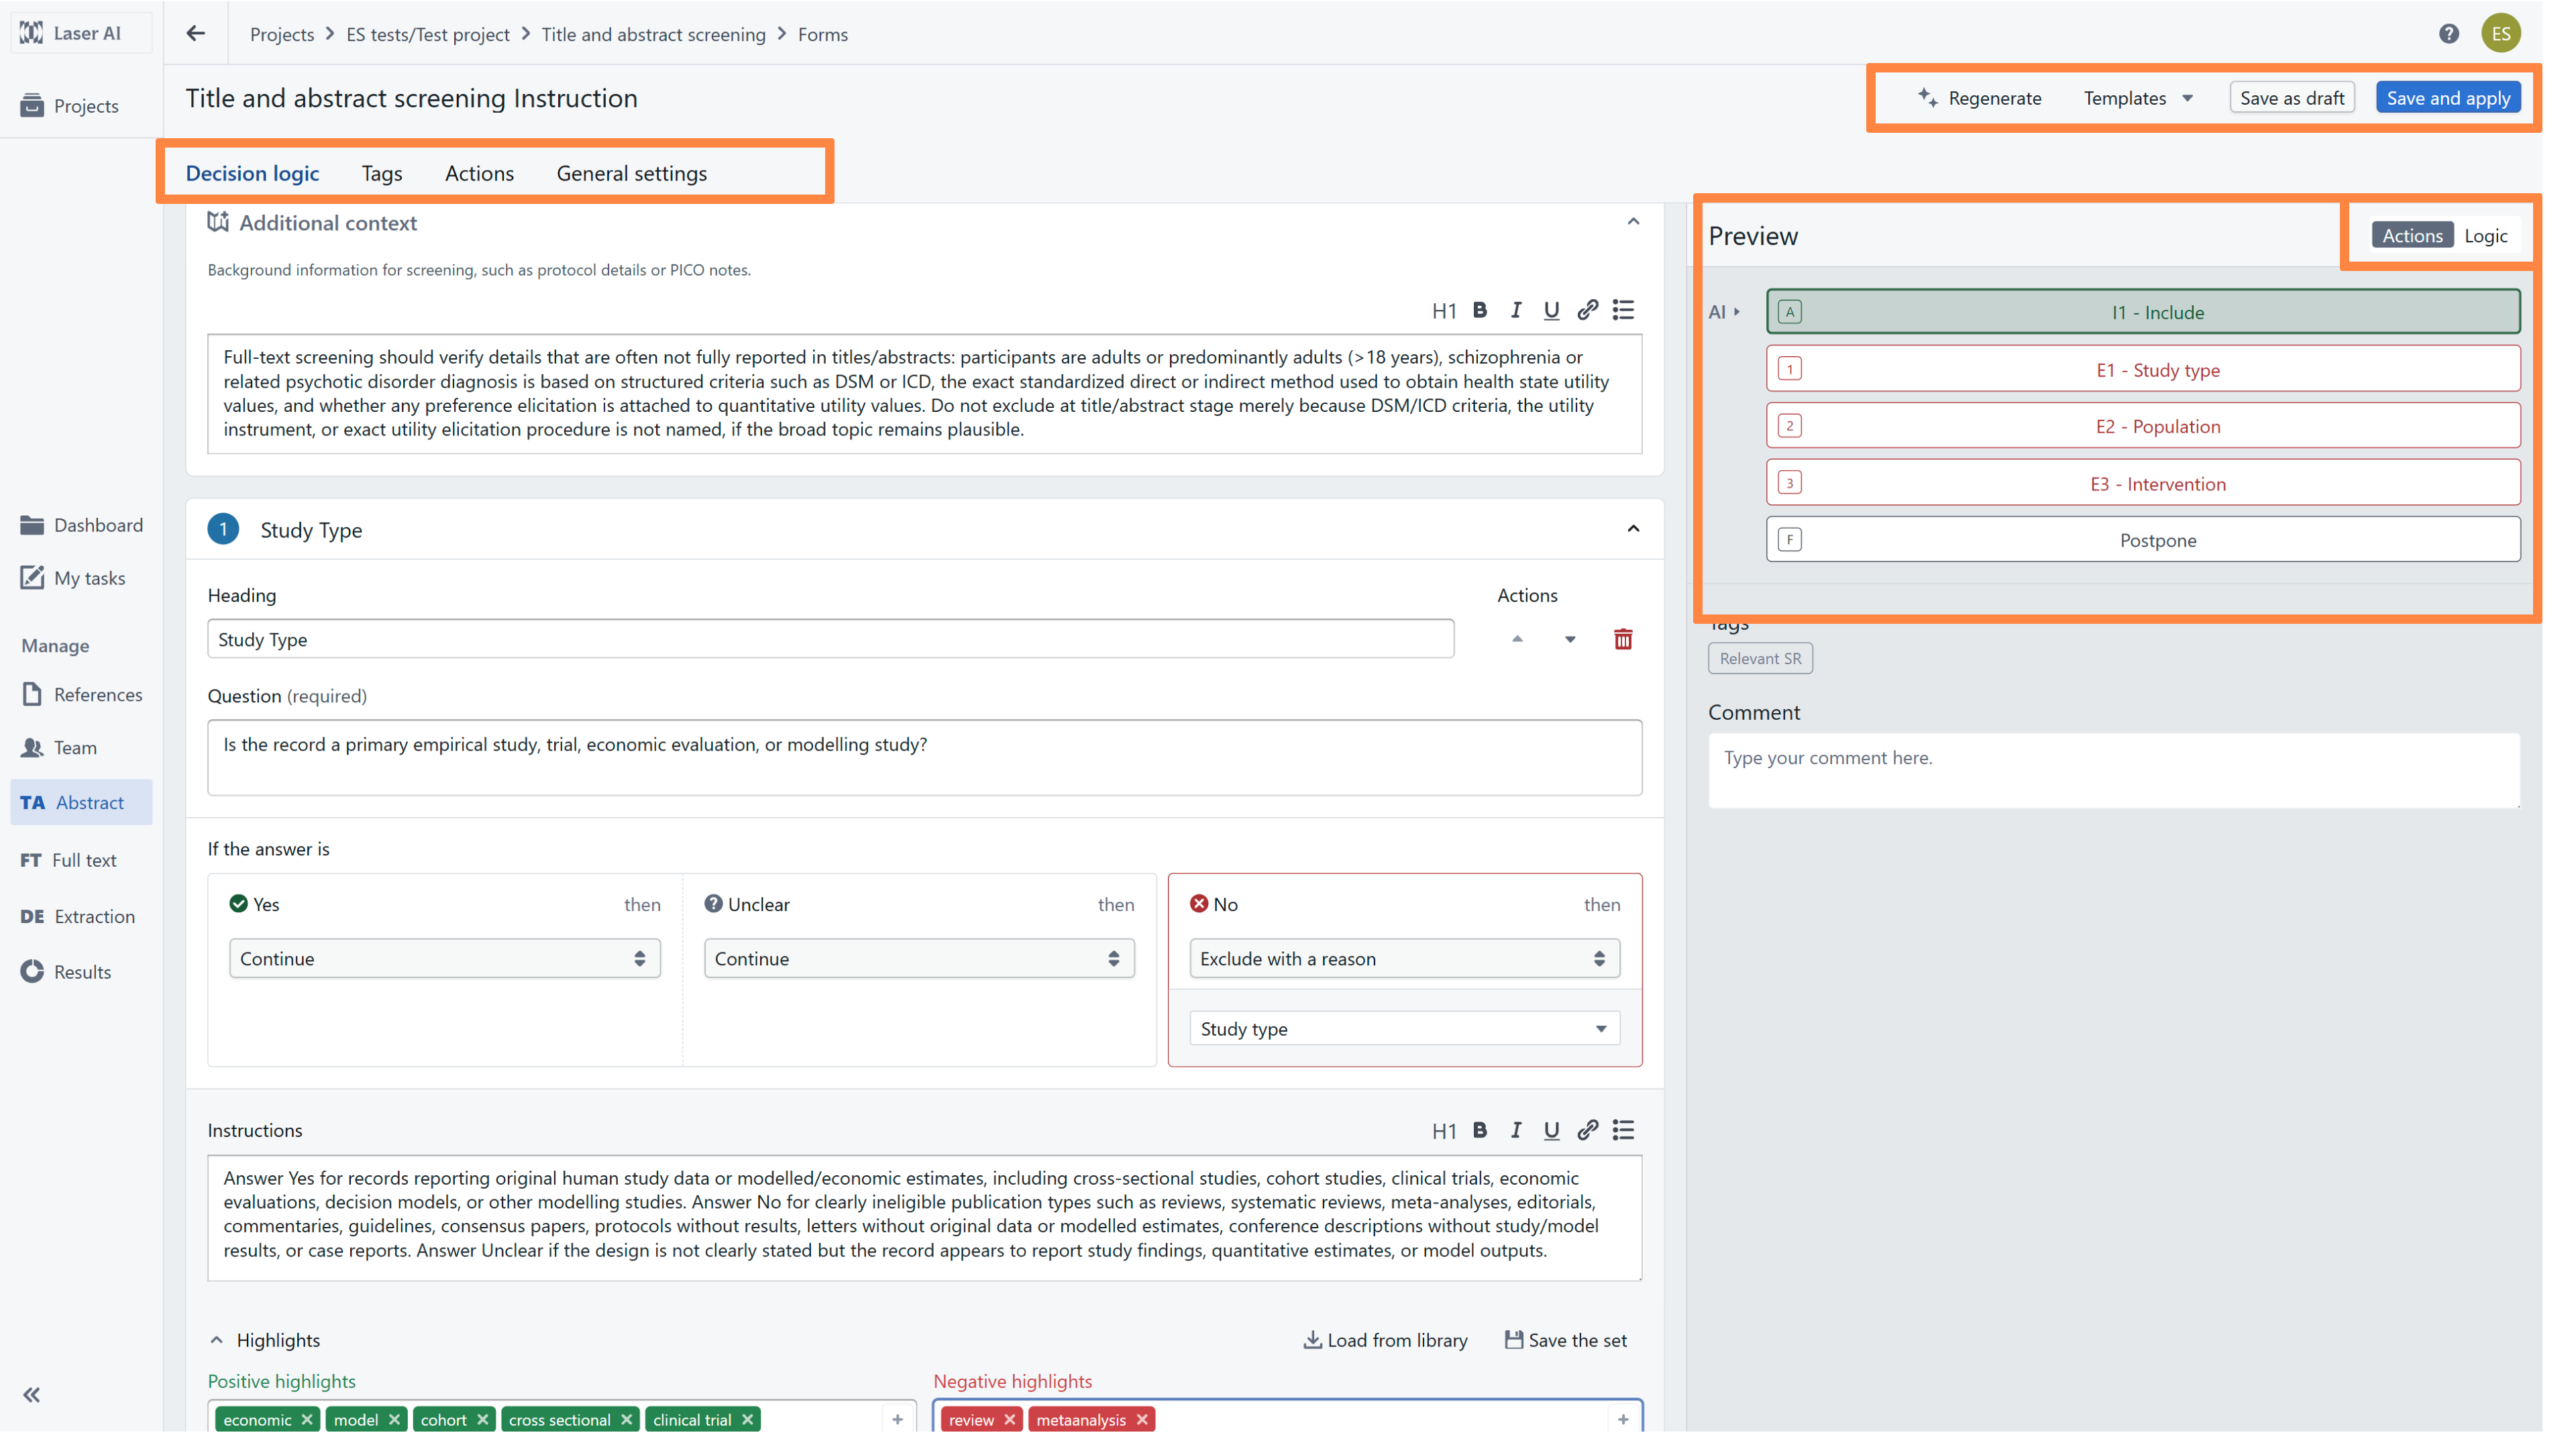
Overview of ‘Decin logic’ tab
Additional context - A text field with AI-generated summary of the project information, such as protocol details, project summaries, and PICO framework elements (Population, Intervention, Comparator, Outcome). This context helps the model synthesize project goals and improve screening decision accuracy. Although it’s generated by the model, manager can add any other important information here.
Heading - A category displayed in the Reference List panel that enables researchers to filter records based on specific criteria.
Note: A Heading must be an objective category name, not a specific exclusion reason. For example, enter "Study Type" as the heading (allowing users to filter both eligible and ineligible study types), rather than a specific reason like "Wrong Study Type.
Question - The primary query the AI model or human reviewer (depending on the project setup) must evaluate. Keep each question specific and focused on a single concept or PICO element (e.g., study design, age range, condition, or geographic region).
Answer mapping - Controls the action taken based on the AI model's response to a decision step - example configuration presented below;
Include / Continue answer: can route the record to the next decision step for further screening.
Exclude answer: can trigger immediate record exclusion and automatically assign a specific exclusion reason.
Instructions - Supplementary guidance that helps the AI model or human reviewer answer the main question accurately. Use this field to define core concepts, list explicit inclusion and exclusion examples, and clarify ambiguous or edge cases.
Highlights - words that suggest that records should be included or excluded, added manually by researchers or uploaded from the library.
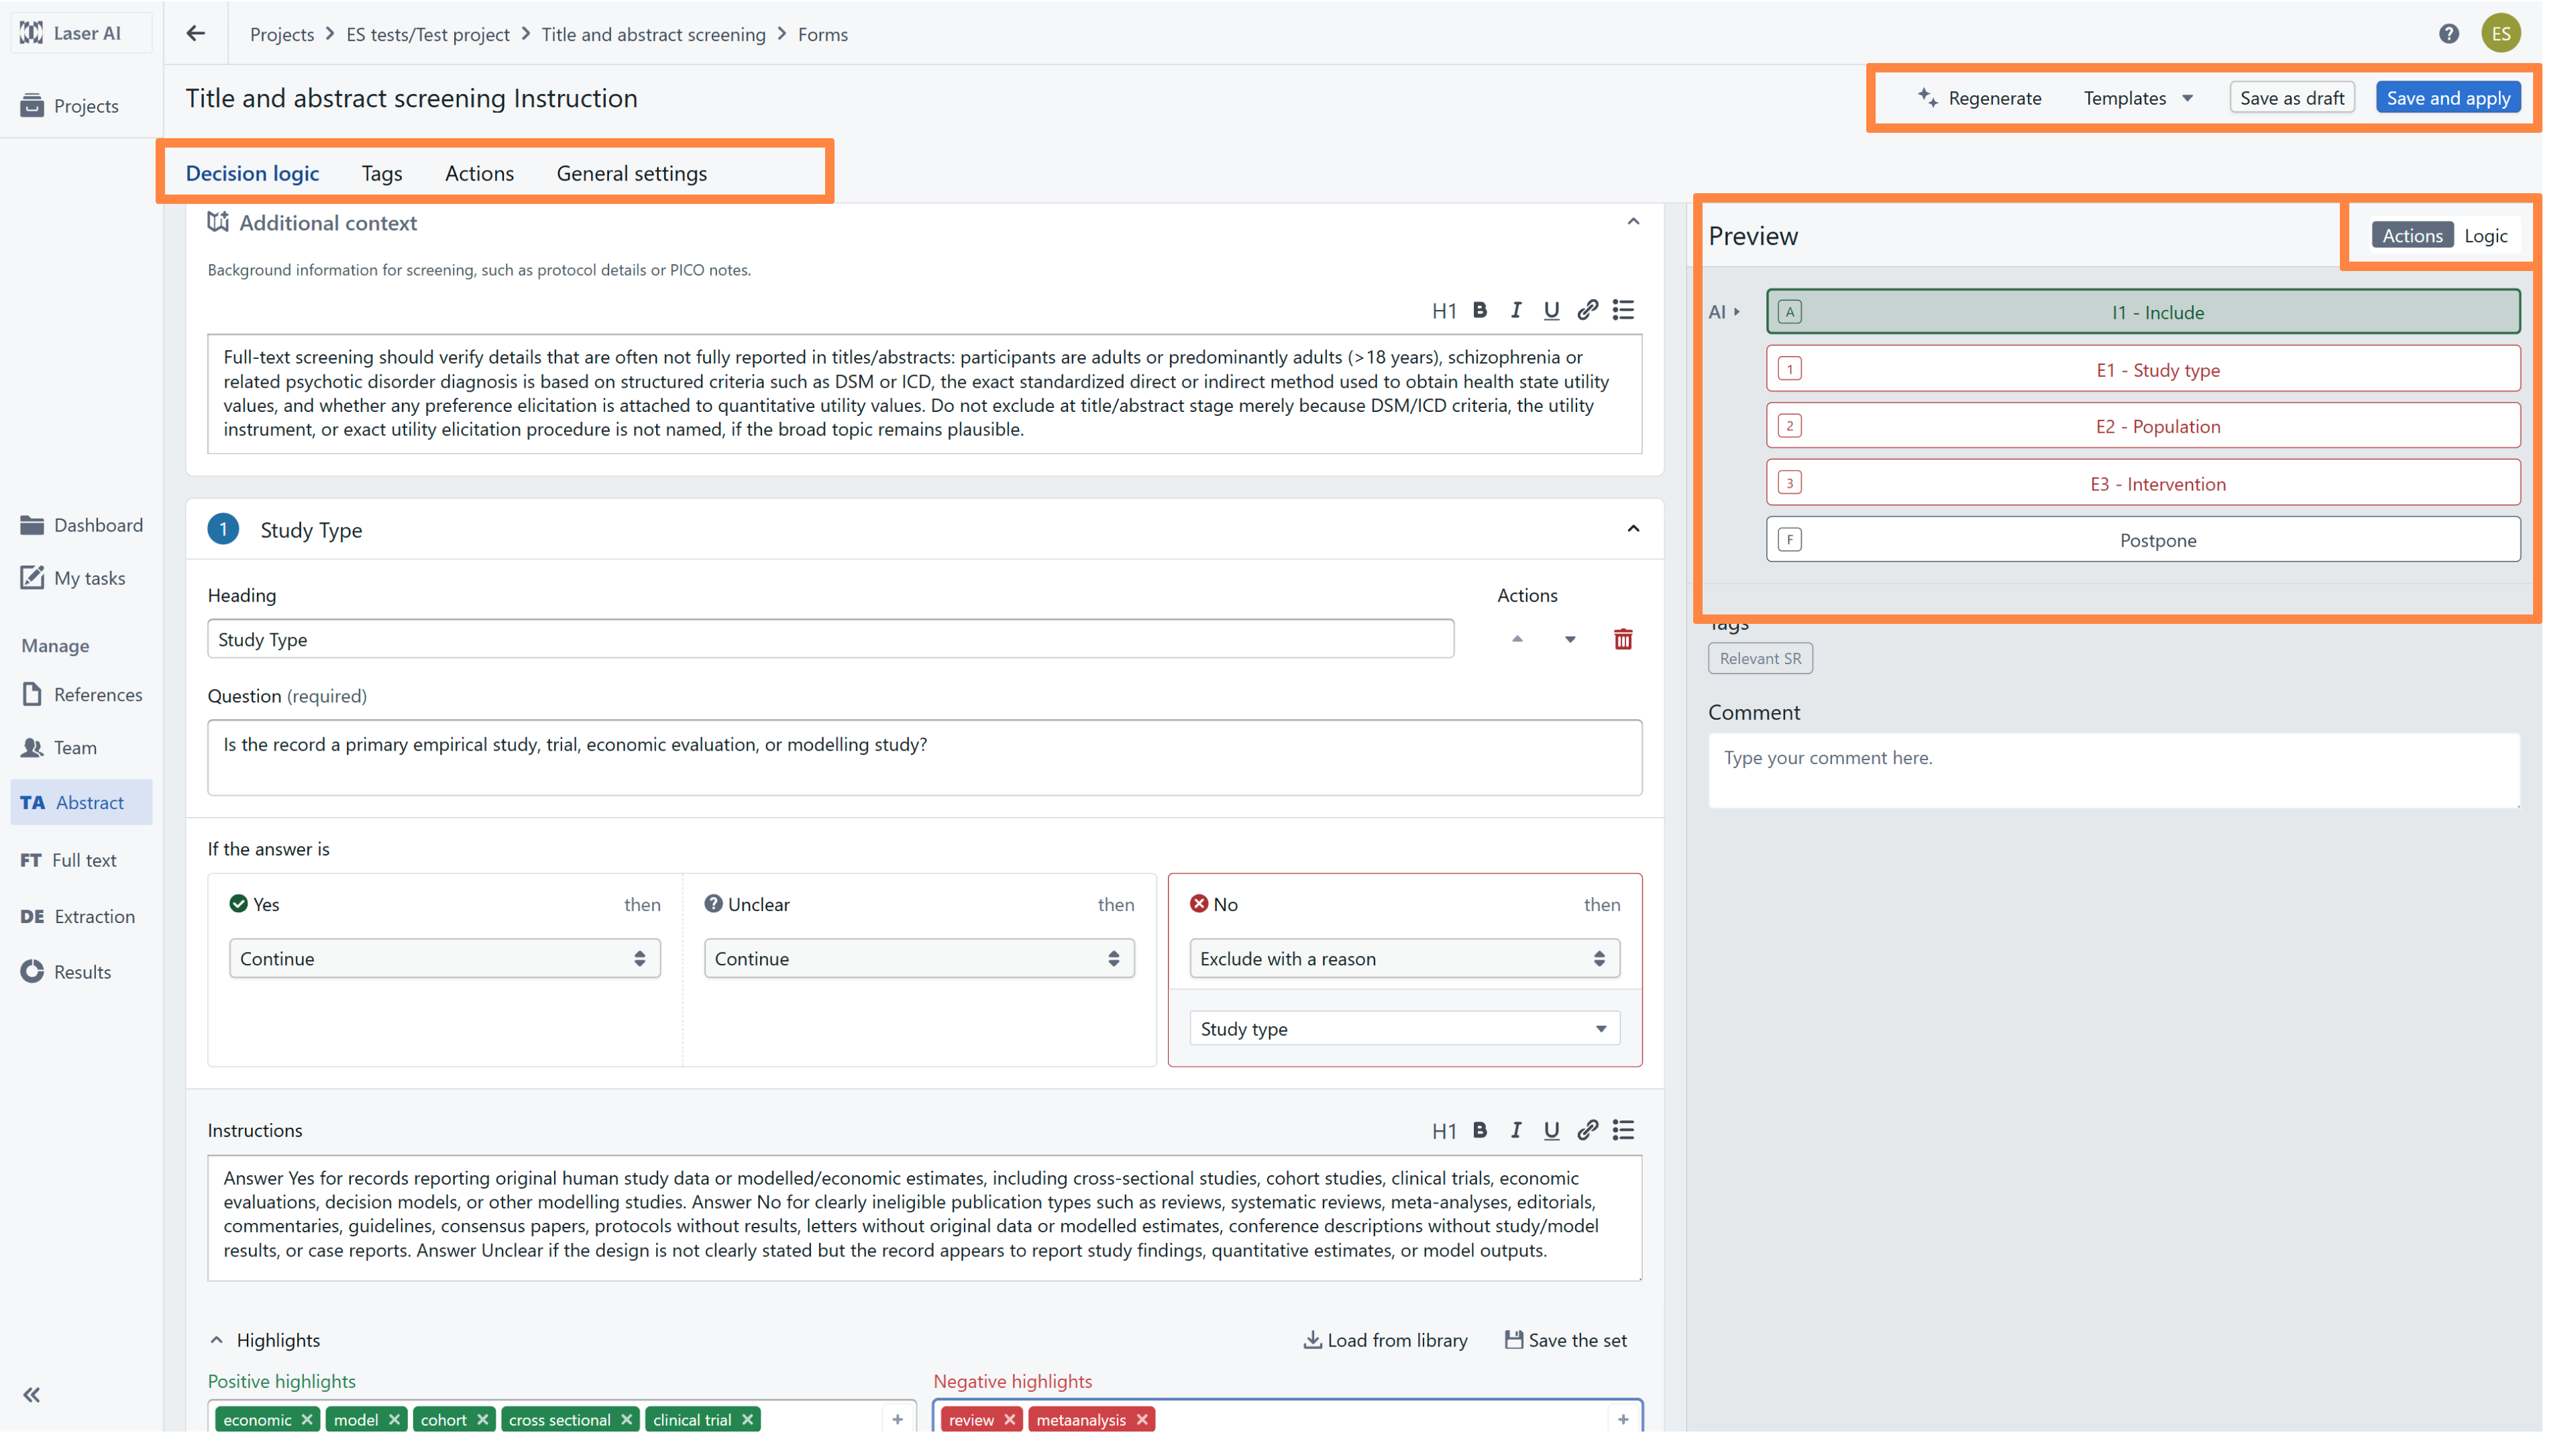
Overview of ‘Actions’ tab
The Actions tab defines the reasons used to include or exclude records during screening. This panel displays the reasons selected during initial setup and allows you to add, edit, or remove action buttons, as well as import new button sets.
Important: Action buttons are directly linked to your rules in the Decision Logic tab. Every logic element must map to a corresponding IN/OUT button. If you add or remove an action button, be sure to update the Decision Logic tab accordingly (see instructions below).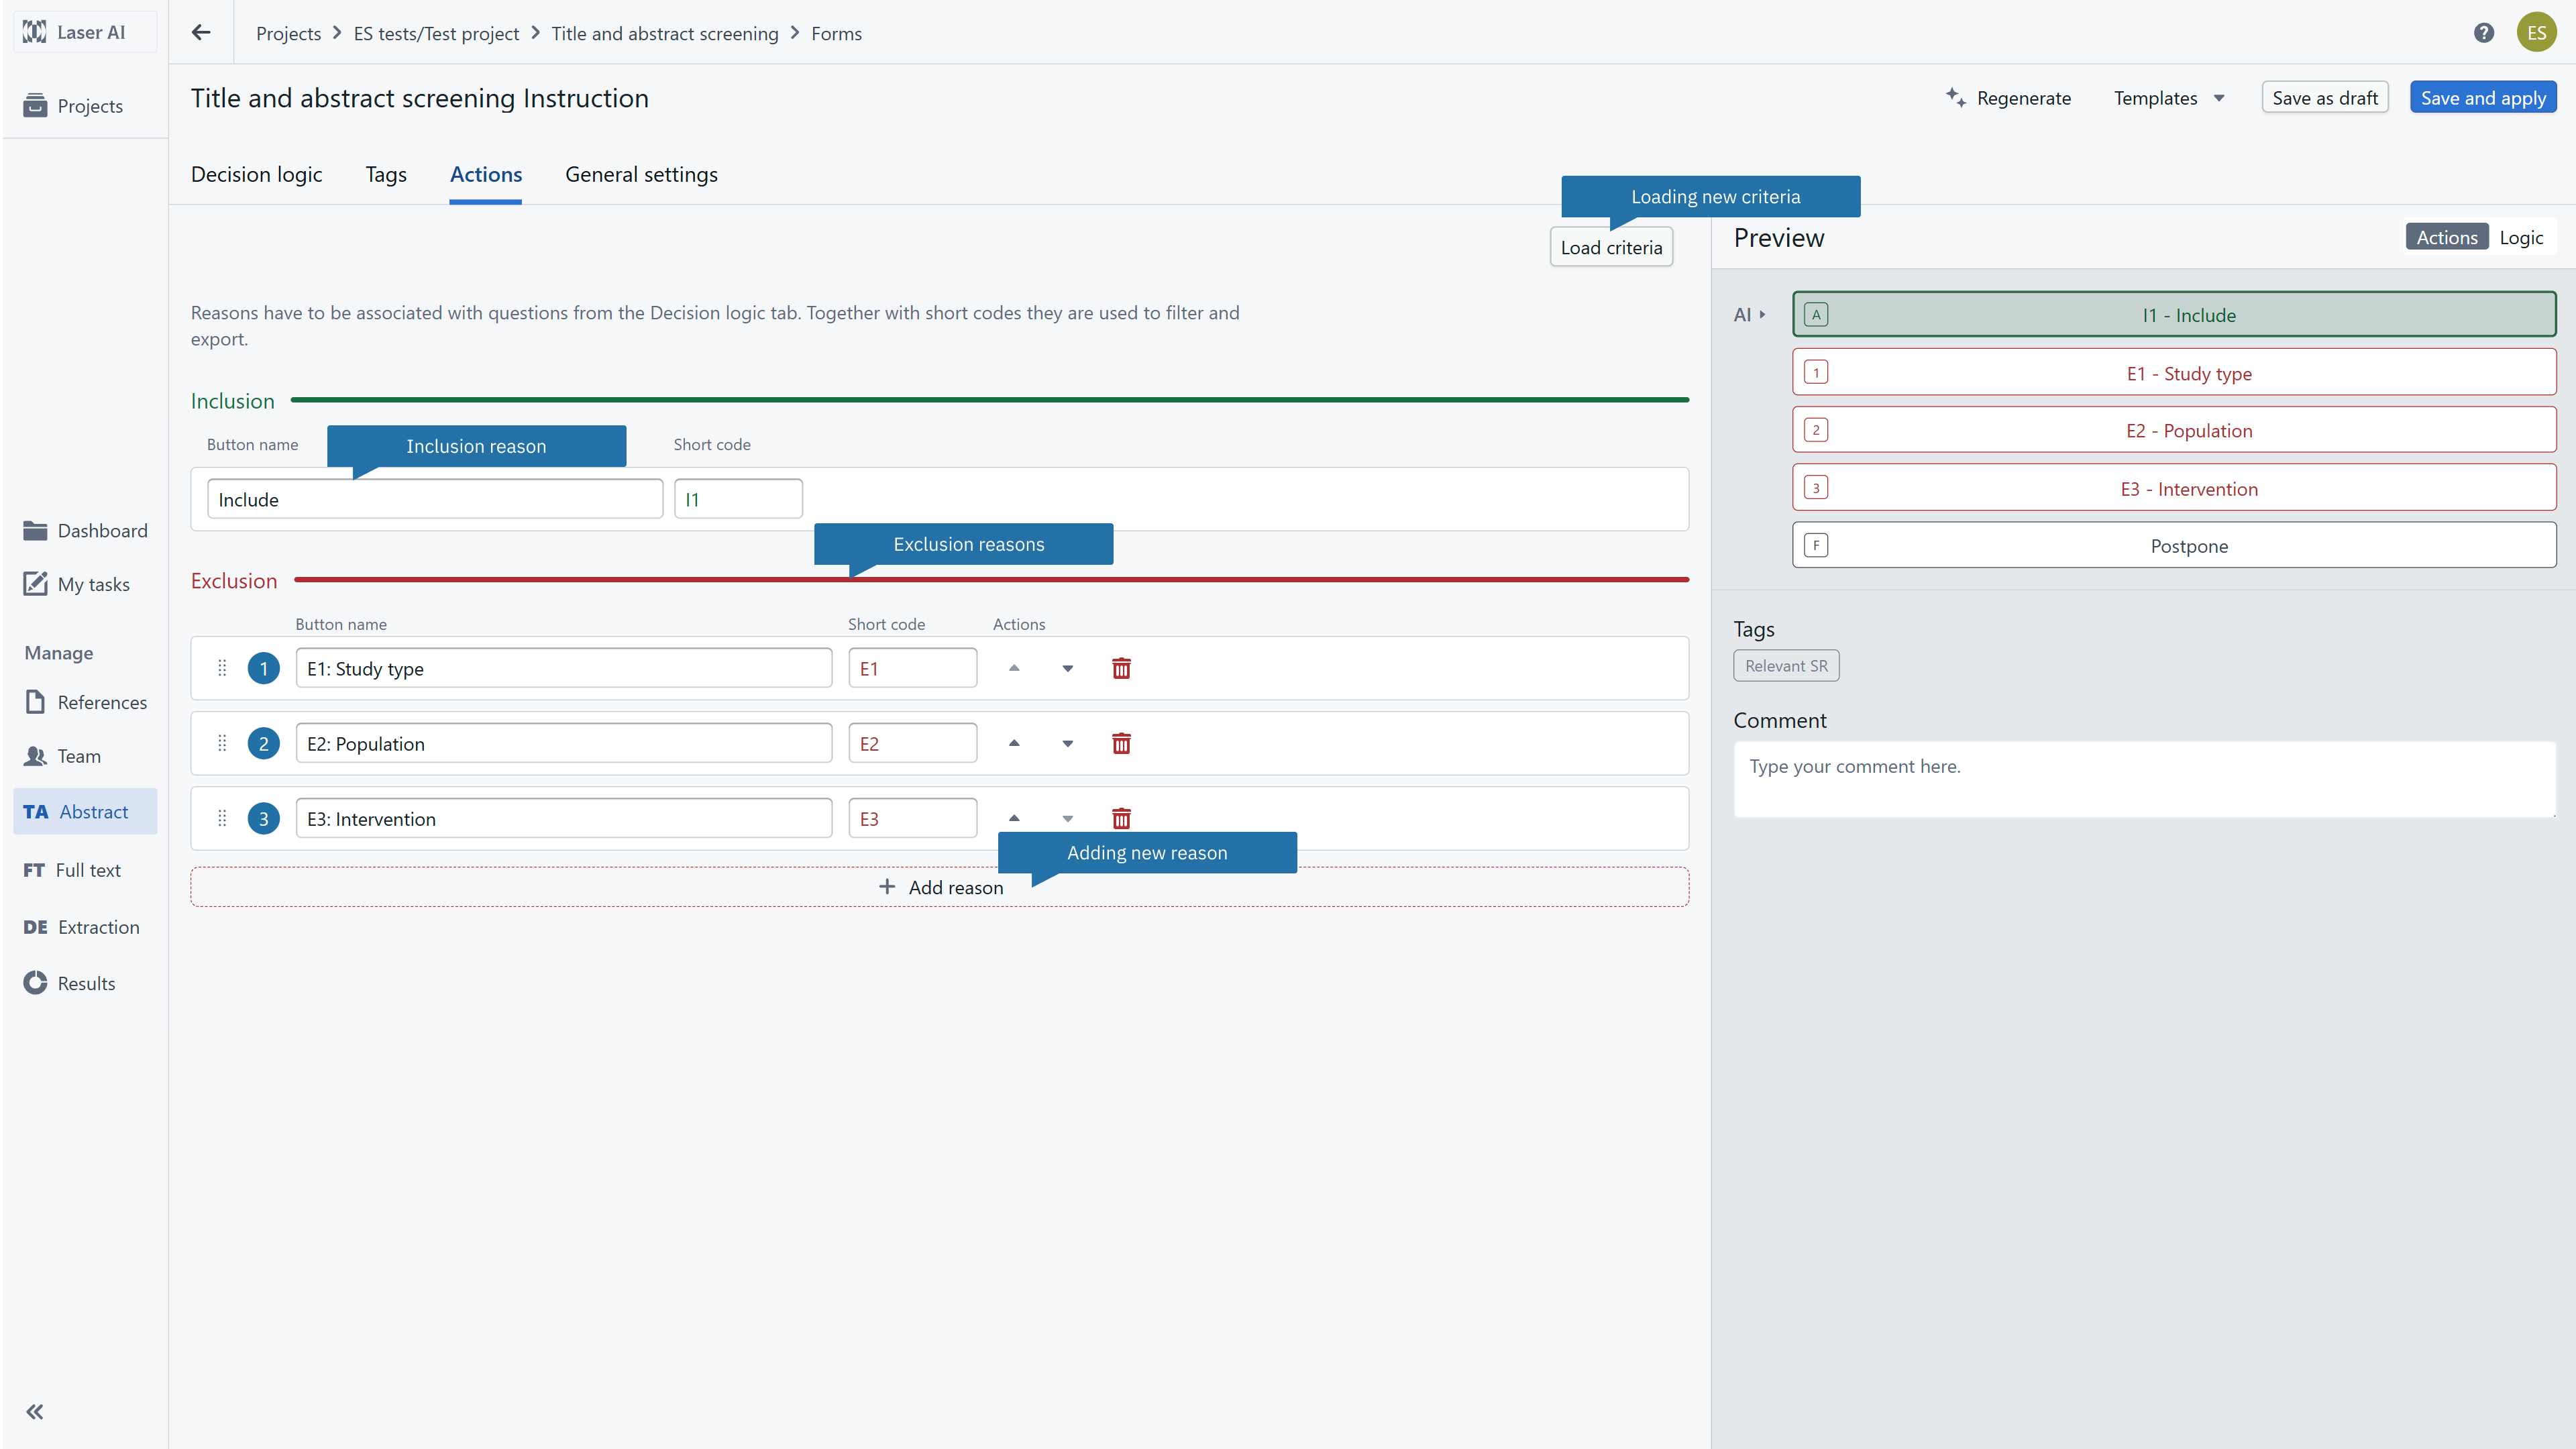
Overview of ‘General settings’ tab
The General Settings tab allows you to manage core project configurations. Use this tab to modify the selected AI assistance level for the stage, adjust researcher view settings, and create new versions of applied screening instructions for further refinement.
How to Edit Decision Logic: Step-by-Step
Follow these steps to customize an AI-generated Decision Logic flow for the Title and Abstract screening stage:
Verify Inclusion and Exclusion reasons in the ‘Actions’ tab - check if they are named correctly and if any button should be added or removed
Check additional context in the ‘Decision logic’ tab - verify if any relevant information should be added to the ‘Additional context’ part
Verify if the heading, question and instructions for the single Decision flow element are correct, add additional information if necessary
Map the answers - check if model correctly matched Yes/No/Unclear answers with appropriate actions - e.g. if after selecting unclear the record is proceeded to the next question
In the case of ‘No’ answer - check if correct exclusion reason is chosen, especially if you added or removed buttons in the “Actions’ tab
Add or load from Library negative and positive highlights
Check if the hierarchy of Decision flow question is appropriate
Add relevant tags in the ‘Tags’ tab
RELATED ARTICLES
Was this article helpful?
That’s Great!
Thank you for your feedback
Sorry! We couldn't be helpful
Thank you for your feedback
Feedback sent
We appreciate your effort and will try to fix the article